

Before moving on, I decided to enhance both the Flamebreaker and the Climber's armor sets to ★★★, where I had to collect some Smotherwing Butterflies around Death Mountain (this was a good opportunity to use up any remaining Fireproof Elixirs while using the full Stealth armor) and some Hot-Footed Frogs. For the latter I probably could have just waited for Zora's Domain, where you can find lots of them in the ponds around the river, but this led me to a completely new discovery in the game, which somewhat blew my mind...
I went to Hyrule Ridge for the Hot-Footed Frogs, because there are many around the area with the mushroom-like rocks. Well, at least I always thought that those were rocks. It turned out that these are actually trees that you can fell:

I didn't know this! For some reason I always assumed that these are oddly shaped rocks, because they sure looked like it. And it's amazing that I'm still discovering details like that after all this time. Anyway, moving on...
Taking the Back Door to Zora's Domain
My agenda for Master Mode was approaching the Divine Beasts in reverse order of my Normal Mode run, where in case of Vah Ruta I literally came from behind. Normally you would approach the area via the Lanayru Tower, where you are greeted by Sidon and then make your way up the Zora River.
But I was curious, what would happen, if you avoid that part and approach Zora's Domain from the Akkala region, specifically from Ulria's Grotto. It's easy enough to climb the hills in the northeast of Zora's Domain despite the constant rain and on the way I even slew the Red Lynel on Ploymus Mountain, which originally was the second-to-last part of the Vah Ruta quest line:

I didn't even need to do this, because I had 240 Shock Arrows already, while for the mission you're supposed to bring 20 of them (as a skilled archer you'll only need four). You really notice here, how the whole Zora's Domain part was designed for an early game approach. It's supposed to be the first dungeon that you do after visiting Kakariko and Hateno. If you do it this late in the game, it's funny how you can skip most of it and how even the Lynel poses no threat at all.
Afterwards I took a plunge from the Shatterback Point, because I was curious, what would happen, if you try to approach Ruta without Sidon. And this gave me a little jumpscare. In the moment, when you're about to land on Ruta, the Divine Beast suddenly makes a loud noise and a force field activates, which pushes you far away. I didn't expect that and in hindsight it would have been interesting to experiment more with Vah Rudania, when it was still climbing around Death Mountain. But hey, there's still one Divine Beast left for doing crazy things.

Otherwise this cut the whole Vah Ruta quest really short. By entering Zora's Domain without meeting Sidon earlier, he will simply be there in the throne room, when you talk to King Dorephan. That's it. "You brought enough Shock Arrows? Let's do this!"
Going this way, this whole quest felt even more underdeveloped than Vah Medoh. You go to Zora's Domain, you talk to the king, you follow Sidon and then you take on the Divine Beast. Even that part became quite easy with lots of stamina. You can effortlessly hit two orbs at once, it's probably even possible to do all four in one attack.
Well, another difference from my Normal Mode playthrough was that I got the full Zora armor before entering the Divine Beast this time. It helps to know, where all the parts are found, though I had forgotten about the Zora Greaves. You have to complete the "Lynel Safari" Side Quest for this and I almost forgot to take the picture, but luckily I thought about it when posting the above screenshot on my blog.
After going to Hebra I also had the full Salvager set from the Xenoblade Chronicles 2 collaboration ready, so this acted as my replacement for fast swimming for now. At least the Salvager Vest looks decent enough in combination with other armor parts. But it was nice to acquire the real deal for Zora's Domain. I only needed some Hearty Bass for upgrading the set to three stars, but those could be found around Zora's Domain.

Vah Ruta Revisited
After entering Vah Ruta you're greeted with a rare sight in Master Mode:
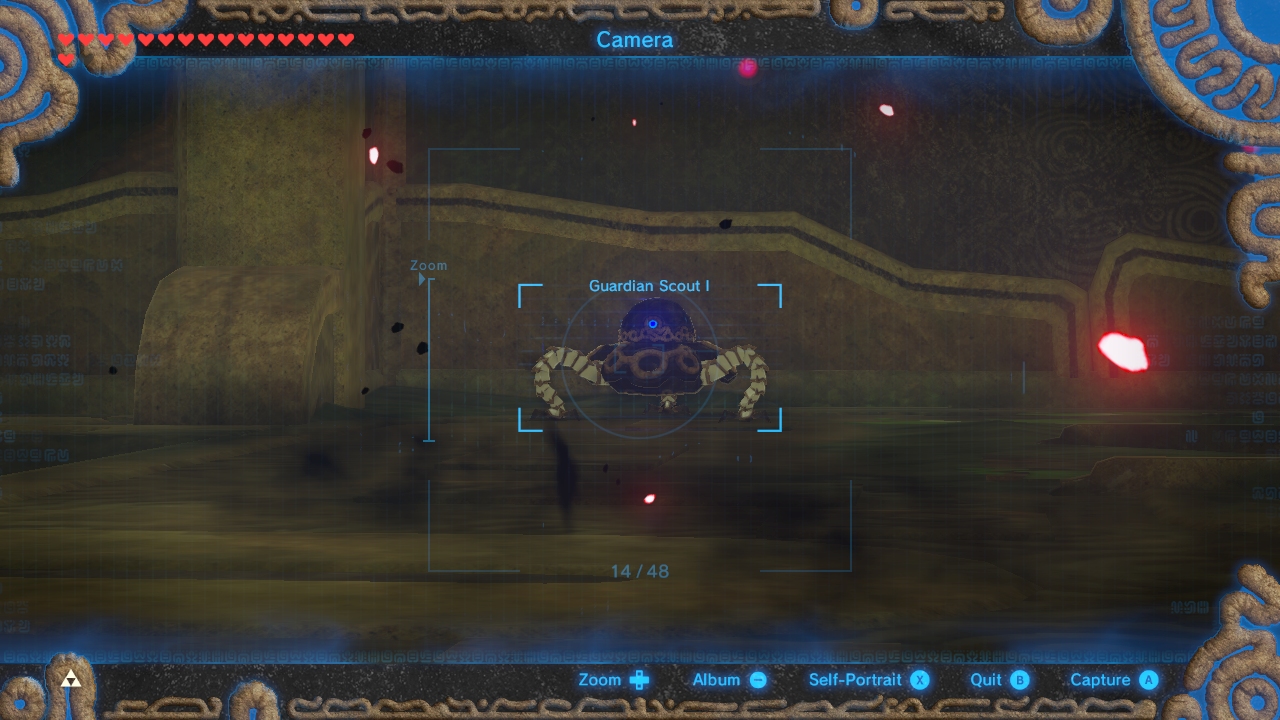
From what I've heard this is the only location in the game, where you can find a "Guardian Scout I" in Master Mode. So, this is essentially its hiding spot, which is a little problematic, because you can't really return here. Well, you can return here in the Realm of Memories, but the Guardian Scout(s) won't be there anymore. And if they were, you'd still have the terrible filter.
Otherwise Vah Ruta is probably the most underwhelming Divine Beast of the four, when it comes to the overall dungeon layout and dungeon controls... But I still like, how you can use the trunk to ascend and land on the upper parts of the dungeon. This was nicely designed.

Low Class Lizalfos
One gripe I have at this point is that all the tribe weapons are way too weak, except maybe the Gorons'. The Zora weaponry looks really nice, but it's pretty much worthless later in the game, when you keep getting Royal gear left and right. This should have been more balanced, where for each tribe there are weapon tiers much closer to the Hylian stuff.
Especially the Champion weapons should have been much, much stronger, maybe even the best of their weapon type, where there's some real value in getting them. But the way it is, they just end up at the wall in my house as a memento. Even King Dorephan admits to you that the Lightscale Trident might not of much use for someone, who already has the Master Sword... Great.

At least there has been a lot of platform play around Zora's Domain, where there are many floating platforms along the waterfalls. Those always seem to carry blue enemies, which are easy prey even for lesser weapons. Still, all the additional chests with weaponry only add to the fact that you don't really need the Zora gear. Which is a shame.
But in general it seems like the area around the Zora River still kept the weakest enemies, not just on the platforms. There were rarely any strong Lizalfos, most of them either blue or black. I even found a normal Lizalfos at a pond with treasure chests. Together with the Red Lynel on Mount Ploymus and the basic Guardian Scout in Vah Ruta, it seems like a good chunk of the lowest tier enemies were hiding around Zora's Domain.
So, there certainly is also some regional scaling of difficulty in the game, where I can't really complain, because this is what I wanted for the most part. It was my own choice that I targeted one of the easiest areas so late in the game. Those Shock Arrows still hurt, though. And at this point it feels like Electric Keese are the most dangerous and deadly enemy in the game. Those annoying little buggers...

Down the River
After Vah Ruta I essentially followed Zora River downstream to do everything there, including all the Side Quests of Zora's Domain, like the "Special Delivery", where you have to follow the "message in a bottle", as well as finding all ten monuments again.
And the whole Zora River is still one of the most beautiful areas in the game, if it doesn't rain there.

Go for Gold
The rest of my journey in this area brought me to Lanayru Bay, or the Oracle Bay, as you could call it, because all the areas around it are named after places in the Oracle games: Samasa Plain, Brynna Plain, Horon Lagoon, Talus Plateau, Lodrum Headland and the Tarm Point.
The latter was the big finale for my Zora journey, where I took on my first Gold Lynel:

It still feels a little bit too early to fight them on a regular level, because without a Defense effect it kept one-hitting me. Of course by now I can fight these guys without getting hit, but I still make mistakes occasionally.

It was worth the trouble, however, because I got a Star Fragment, as well as the two Gold Rupees defended by the Lynel. Though you can just grab the chests without fighting him, which I did the last time.
Apropos Star Fragments, Lanayru Bay and still taking too much damage: I also did some Star Fragment and Naydra farming afterwards by constantly switching between the two, which helped quite a bit with my progress of enhancing all the amiibo armor. I use the common method for Star Fragments on Dueling Peaks, which even works while writing this blog, because you just have to stand there and watch the night sky. After I got a Star Fragment, I would warp to Lanayru Promenade and wait there for Naydra to appear to score a piece of its shiny body. Then warp back to Dueling Peaks, skip to morning, skip to night, repeat.
Of course you can do this with any of the three dragons, but I didn't get any Naydra parts yet and I was heavily reminded of that, when I saw the dragon flying above Lanayru Bay. I already hit Dinraal a couple of times and Farosh will be covered by my next goal, where I want to conquer the Faron Tower and its area, where you will meet Farosh at Lake Floria plenty of times, while you salvage the one million treasure chests there.
Here is my Hero's Path for the Lanayru area:

Master Mode Progress:
- Divine Beasts Freed: 3
- Main Quests: 10/20
- Shrine Quests: 27/42
- Side Quests: 62/90
- Memories: 14/23
- Shrines: 93/136
- Koroks: 715/900
No comments:
Post a Comment