Sunday, September 29, 2019

Link's Awakening Remake Artbook - First Look


Now that I've fully completed the remake, I could finally allow myself to study the artbook that came with the European Limited Edition. I suppose, the only real "spoiler" inside the book would have ben the design of the Koholint Sword, but Nintendo had posted that part of the artbook already.

But it's lovely how much dedication went into the design of the houses. In the original game the houses all mostly looked the same, but here a lot of effort went into individualizing every single house, where the artbook has about as many interior and exterior designs as it has character arts.


Sadly, the printing of the artbook somehow went faulty. There are two parts of four pages each which have swapped places, between sections 3 and 5. When the book goes into the Catfish's Maw, you'll suddenly find artworks for Richard, Kiki and Kanalet Castle, while the Catfish's Maw arts are found in the respective part of the book (see above). That's a shame, but otherwise the artbook really is a nice item, which accompanies this beautiful game.

Link's Awakening Nightmare Diary 4

Done. 100% in both Normal Mode and Hero Mode. Considering that I wasn't even playing the game on my own Nintendo Switch, this achievement was more than I had expected. And I'll gladly do it all over again, as soon as I have my own Switch. The game is short, but sweet, where it's the perfect game for one weekend.

Well, the GameBoy original was more the perfect game for one evening, where I could complete it in a couple of hours, but with all its additions the remake can keep me busy a little bit longer. Most of the busy work goes into the new Chamber Dungeon, however, where after beating the game I still had the twelve golden Challenges open, as well as more Chamber Stones to buy from the Town Tool Shop...

Link in front of the Town Tool Shop

This creates this little cycle at the end of the game, where you keep buying more Chamber Stones for the Chamber Dungeon and then clear challenges in the Chamber Dungeon to earn more Rupees for the Chamber Stones, where your entire world takes place in Dampé's Shack and the Town Tool Shop now.

But it's all entirely optional and if you don't care about the Chamber Dungeon and just want all other items, you can simply clear the twelve basic challenges and then be done with the game. But I do care, because I like the feature and this gives me something more to do afterwards. A little bit more of Link's Awakening dungeon action.

In a way this reminds me of the fishing in Majora's Mask 3D (also done by Grezzo), where you could either completely ignore it, if you didn't like the addition, or spend a lot more time with the game in order to catch all the different fish...

Anyway, up until this point I was only able to afford one of the Chamber Stones from the shop, which means I had six more to go for a total of 7680 Rupees. And I was a little bit worried that I had to grind for Rupees, so I could buy them all. On my first playthrough I was playing around with the mini-games a lot more, so I got many more Rupees from those.

And I also was more excessive with building dungeons in the Chamber Dungeon, because I wanted to try everything. Now in Hero Mode I went for much more efficient solutions to the all the challenges and I played through the game much faster, because I didn't have to search for all the Secret Seashells any longer, so I didn't have as many Rupees in the end...

However, doing all the golden challenges was more than enough for all the extra Chamber Stones. You get 300 Rupees for clearing one of them, so that's already 3600 Rupees. In addition you'll get more Rupees from opening any surplus treasure chest, while the real help comes from the +Rupees Effect, which you can use once in every challenge.

The results from both can be quite different, however, and I don't know the exact rules to this yet. Sometimes you keep getting red and purple Rupees for some good amounts and sometimes you're stuck with blue and green ones, where opening treasure chests never has been more any unsatisfying as in the Chamber Dungeon... I suppose, it has to do with the size of your dungeon, where it has these different tiers (like Shrine, Cave, Maze and Labyrinth). The bigger the dungeon, the better the rewards. But the difficulty might also influence this, so a dungeon entirely made out of easy to grab treasure chests won't help you either...

Well, despite the lack of Rupees in some challenges, I was getting more than enough to buy all the extra Chamber Stones from clearing the gold challenges. So, no additional Rupee grinding was required, which is good. In fact I already did get all Chamber Stones after clearing the infamous "Nothin' but Stairs" challenge. Speaking of, again it didn't even took me five minutes to solve this one again...

The Nothin' But Stairs challenge completed in the arrangement menu.

It's not hard, really. All you have to do is to take all possible chambers with stairs and throw them together until it fits. Maybe I was lucky twice with how it all connected, but I don't think this is the case. It's still the most complicated challenge, but it doesn't seem to be all that difficult to figure out.

The real fun part about this challenge is playing it, because all those tunnels can lead to some unexpected results. With the above version I kept running into dead ends, where I was missing keys for the locked doors (which normally never happens in the Chamber Dungeon, because you're getting the keys first). I had to take just the right tunnel in order to make progress and I was going all over the place. Plus, you never know what tunnels you end up with... So, this was a lot of fun to play and probably my favorite experience with the Chamber Dungeon so far.

Again, this has me convinced that a fully randomized Chamber Dungeon feature would be much more fun than playing your own creations. I enjoy the building part, but playing my own dungeons, where I already know where everything will be located and what the best route will be, isn't exactly exciting... It's just all going according to your plan.

Back to the Chamber Stones from the shop, I've purchased them one by one and noticed how I got them in a different order than the last time. This is how I've obtained them:

  • Shop #1: Hardhit Beetle's Chamber with four exits
  • Shop #2: Great Fairy's Chamber (Color Dungeon) with three exits
  • Shop #3: Dodongo Snakes' Chamber (Turtle Rock) with two exits
  • Shop #4: Cracked Floor Chamber (Turtle Rock) with three exits
  • Shop #5: Flying Tile Chamber (Face Shrine) with mirrored exits
  • Shop #6: Hot Head's Chamber with three exits
  • Shop #7: Blaino's Chamber with the entrance to the right

And this was the order from my Normal Mode playthrough:

  • Shop #1: Hardhit Beetle's Chamber with four exits
  • Shop #2: Flying Tile Chamber (Face Shrine) with mirrored exits
  • Shop #3: Great Fairy's Chamber (Color Dungeon) with three exits
  • Shop #4: Cracked Floor Chamber (Turtle Rock) with three exits
  • Shop #5: Dodongo Snakes' Chamber (Turtle Rock) with two exits
  • Shop #6: Blaino's Chamber with the entrance to the right
  • Shop #7: Hot Head's Chamber with three exits

Huh... It's still the same seven chambers, so you're not mixing this with the chambers you get from Dampé or other Chamber Stones. It's just that I got them in a different order this time. But I was also getting them all at the end of the game now, while previously I kept buying them once they became available.

But with all Chamber Stones in my possession before clearing all challenges I allowed myself to cheese the last one:

The Supreme Shape challenge in the arrangement menu. The dungeon is large and shaped like a Z, but there is only one chest and it's right in front of the boss chamber, together with a tunnel leading to the entrance. The room above the entrance also has a +Rupees Effect on it. All other chambers are blanks with no chests or locked doors.

Map of the finished Supreme Shape challenge. Only four rooms have been visited out of 41.

And here I thought my minimal Turtle Rock run was impressive...

The idea came from bcornelia on GameFAQs and I wanted to try this for myself. My result isn't as clean, but it still worked. I even got way over 600 Rupees for clearing this challenge thanks to the +Rupees effect in the first chamber.

And this is what you get, when you make too many chambers without chests or locked doors, Grezzo! Come on... Especially locked doors are way too rare for some reason. If some of those chambers had locked doors or chests, this wouldn't have been possible, at least not in such a ridiculous way.

Well, at least I turned the "Skull Arrangement" challenge into another boss rush as the real final challenge. I even was able to fit absolutely all boss and mini-boss chambers in there with the exception of the mirrored Gohma chamber, because there are like six mini-bosses with the exact same layout (exits down and left). But since you already have one of those, this isn't a big loss. And there probably even is a way to fit them all together...

Anyway, the only thing left to do here now would be building my own challenges and trying to score a good time. For that you want to use the Red Mail, however. At first I wasn't sure, whether the Red Mail and the Koholint Sword would stack. It didn't seem like they did, similar to the Guardian Acorn and the Blue Mail. And it's certainly not quadrupling the damage any longer, but it does increase it slightly. I've noticed this mainly with some of the bosses. In case of Blaino I only need three hits when I combine the Koholint Sword with the Red Mail. Without the Red Mail it takes four. I can also defeat the Gohmas and the Slime Eel in one cycle, when I have the Red Mail equipped, but I'm usually one or two hits short without...

So, the Red Mail will help to beat Chamber Dungeon records, but you will also have to live with the double damage in Hero Mode then...

Oh, and the "+Hearts Effect" really does work in Hero Mode. It's one of the few ways of finding hearts in this mode.

Link standing in front of Dampé's Shack after completing the game.

And we're done. This was the last entry into my "Dream Diary", where I'm really happy with the whole journey. Yes, I have been nitpicking quite a lot, but this only shows how close to perfect this game really is. And hopefully Nintendo will release an update to improve some of the issues. But overall this remake really is a dream and I'm sure that I will be replaying this version of the game many times over.

Final Hero Status:


  • Secret Seashells: 50
  • Pieces of Heart: 32
  • Chambers: 193
  • Chamber Stones: 14
  • Challenges Cleared: 24

Saturday, September 28, 2019

Link's Awakening Nightmare Diary 3

Link crossing the holes at the castle moat with the Flying Rooster
Doing this the oldschool way.

After the fifth dungeon Link's Awakening usually turned into a dungeon crawling experience. The Hookshot gives you some more side quests to do, especially in the remake, but after you're done with those it's one dungeon after another. It's an "issue" that various Zelda games have, for example it's similar for A Link to the Past and Twilight Princess. So, it's nice that the remake gives you now a little bit more to do between the dungeons, even if it's just more Trendy Game or fishing.

While the Trendy Game gives you a new figurine after every dungeon, the fishing only upgrades after dungeons 4 to 6. The Angler's Tunnel unlocks the Cheep-Cheep and the Catfish's Maw the Blooper (you're also getting the figurines for these two after the same dungeons by the way). And after the Face Shrine the Ol' Baron starts to appear.

In my first playthrough I didn't bother with playing the fishing again until somewhere near the end of the game, so I got all of these special fish at once. Now I did them one by one and it made a lot more sense to get the heavyweight lure from the Blooper at this point. You use the middleweight lure on the Bloopers and then the heavyweight lure on the Ol' Barons in the next step. Also, it felt much easier to catch the Bloopers now, probably because I think I know what to do to catch them...

Back to the Boomerang I noticed that you have to trade the Shovel and only the Shovel now to get it. It's the only item that the Goriya Guy will accept. On the GameBoy you could trade any item that didn't have a level (like sword or shield) or a counter (like bombs). The Toadstool also didn't work, but you could for example trade your Roc's Feather, your Hookshot or your Pegasus Boots. Of course it's a bad idea to give these away, so everyone always trades the shovel. But it seems the remake isn't giving you any choice here, where they could have saved themselved the trouble of this item prompt with the X and Y buttons. He could have just asked for the Shovel...

Anyway, the Hookshot is giving you a lot of options for what to do next, where I also went back to the mountains already. Because you know, I love crossing the one cave, though at this point it will be for the last time, because with the Hookshot you can finally reach the Eastern Tal Tal Mountains warp point. It doesn't really replace a potential warp point near the exit of the first, long mountain cave, because from the east end you still have to traverse two more caves to get back to the central mountains, after you finally got the Flying Rooster...

Link and the Flying Rooster at the Eastern Tal Tal Mountains warp point. It's in front of three caves.

So, it's not really worth it to go there early with the Hookshot. But at least this warp point is somewhat practical in Hero Mode, because it's right in front of a Fairy Fountain, where you can easily refill your fairies.

And to me it feels like these Fairy Bottles got primarily added for Hero Mode. I've never used them even once in Normal Mode, but here I've been using them regularly, since they only heal seven hearts and there are no other healing options. The only fairies to be found are those in the three fountains. Not even the "light the torches before the boss of the Face Shrine" trick worked any longer...

Last room before the boss in the Face Shrine. The torches are lit, but no fairies are visible.

While it's nice that the Fairy Bottles aren't just inventory decor any longer, I still feel like the game is missing something when I don't get fairies from destroying Sparks.

The Secret Medicine on the other hand never kicked in once. While the lack of healing options makes you worry a little bit in Hero Mode, like in other Zelda games with a similar mode the increase in difficulty gets less and less noticeable the further you proceed into the game... So, I never got to zero hearts in Hero Mode, not even once. And those treasure chests with Secret Medicines inside them are still trolling me, where I had to leave three chests behind for no good reason.

Anyway, as I've been saying, going for the rest of the Tal Tal Mountains early with the Hookshot isn't really worth the trouble. That's especially true for the west half. I went there anyway, because I was about to complete another Heart Container, but all the new Pieces of Heart around the Rapids Ride would have done the trick just fine. And since you can't get the last Piece of Heart and the last Secret Seashell before going into Level 8, there is no good reason to visit the area early, unless you really want that Magic Powder upgrade. Or you've screwed up and already have the Magic Powder upgrade and want the Bombs or Arrows now. Usually, I select the Bombs first (by saying "no" to the Magic Powder in case you didn't know), where you will have a full 60 as soon as you acquire your first bombs from the shop or the Chamber Dungeon.

But for an efficient 100% it's best to ignore the mountains at this point and simply focus on finishing the trading quest, getting some of the remaining Pieces of Hearts in caves and then go for the Rapids Ride, which unlike the GameBoy version has a lot to offer now, but exactly like the GameBoy version offers a nice transition to the Face Shrine.

I was hoping that the Face Shrine might have been more like the original in Hero Mode, but that's not the case. There are no secret rooms here any longer...


Entertaining Evil Eagle


Link playing the Ocarina in the middle of the first floor of the Eagle's Tower. He's on an elevated area surrounded by crystal blocks.

I still love the Eagle's Tower, no matter how many times I complete the dungeon. It's great and I'm always sad when it's over. But at least in the remake you get a little bit more of it right afterwards with the Chamber Dungeon. I enjoy returning there after each dungeon, where the next challenge(s) I usually focus on using the new chambers from the last dungeon, in this case the Eagle's Tower. I even came up with the rule that in the very least I have to use the last dungeon's entrance and boss for the next challenge.

And in this case you are doing a "No Sword" challenge next, which leads to fighting the Evil Eagle in a different way... with the Boomerang!

The entrance of the Eagle's Tower in the Chamber Dungeon. Link has no sword equipped.

Link defeats the Evil Eagle with his Boomerang

The Hookshot doesn't hurt him any longer (or anything, really). And I didn't have the Magic Rod yet, so this was the best option. Arrows probably would have worked as well, but the Boomerang does its job nicely. But with challenges like this you get to learn all the different ways of disposing your enemies other than the sword, even if your secondary weapons aren't as overpowered as they used to be on the GameBoy.

The Koholint Sword is now the strongest weapon in the game. But at least in Hero Mode I didn't get to use its sword beams as often, because I wasn't constantly healed up, so the long-range weapons still have its merits. And Bomb Arrows are still overpowered, as they should be. You can kill some of the bosses very quickly with those, but of course you have to careful not to blow yourself up. They can easily get caught on a block or something and then explode in your face.

As for the "No Sword" challenge, it also gave me the underwater tunnel with the Cheep-Cheeps, which I now had to actually dodge carefully for the first time. Without a sword these tunnels play a lot more like a Mario game...

Link, Marin and Tarin after Marin's rescue.
Why didn't you just long jump, guuurl?!


Minimal Turtle Rock


Back to the last proper dungeon in the game I decided to try my patented minimal run or this dungeon (see my old article about the Magic of Link's Awakening), where I visit only a little over half of the rooms on the map to get to the Thunder Drum...

The first set of three connected rooms in the Turtle Rock dungeon. A block has been pushed into the lava for a shortcut back to the lower path with the floor maker.

And since the remake is quite faithful to the original, this still worked. However, because some of the rooms are now connected and count as one on the map, there are two more squares visited on the map now than there used to be. It's not a big deal, however, because the result still looks quite impressive:

Map of the Turtle Rock dungeon after the boss was beaten. Only about half of the rooms were visited.

It's now exactly half of the dungeon, 23 of 46 rooms are shown as visited. This route even skips most of the mini-bosses, where you will only have to deal with Blaino and the Fire Cue Ball, which are protecting the dungeon's main item and the Nightmare Key respectively.

And if you go to Dampé right after, you will still get all the chambers for the Turtle Rock dungeon, including all the other recurring mini-bosses. So, this should confirm with all certainty that you're getting all chambers of a dungeon, once you've beaten it.

Anyway, I have to say that I'm quite disappointed by the Magic Rod in this version of the game. Its fire effects are nice, especially on the grass, but it got nerfed quite badly as well for no apparent reason. In the original it literally lets you burn it all, where here the stronger of the normal enemies still take two hits. It also fires quite slowly, where hitting Hot Head with the thing isn't as easy as it used to be... Even for the Evil Eagle I still prefer the Boomerang or the Sword, while in the original the Magic Rod was probably the best weapon against this boss.


Hero Mode Finale


Link in the entrance room of the Wind Fish's Egg.

And then it was already time to wake up the Windfish again. This is what the maze had in store for me in Hero Mode:

→↑→↑↑←↑↑

I tried saving and reloading the game before reading the book for the first time, but the order remained the same. And I still think it's entirely random this time, so you can't just try the four known combinations until you get it right. Left, up, right, up, left, up, right, up and so on...

During the final battle I noticed how the Magic Rod is even less useful now. As if the poor thing didn't receive enough beating already... When I played the against the new Nightmares for the first time, I used the Magic Rod on Lanmola, because that's how I always did it. However, it doesn't get killed in a single hit any longer, not matter what weapon you use. Fair enough, but the Shadow Lanmola can be a literal pain in the ass, because it's constantly homing in on you. Which is why I tried the Boomerang on the thing and it stuns it. It stuns the Lanmola, making it much, much easier to kill than with the Magic Rod or any of the other weapons.

This means the Boomerang is still quite useful in the final boss fight, even though it doesn't really help with "DethI" any longer (Arrows are much easier and faster now). It won't help with the annoying Ganon phase, however. That one is still about taking a hit, so you can hit. Unless you like dodging his nasty attacks for minutes.

So, roll credits! I even had a little tear in my eye this time, when the story came to an end. When I first finished the game as a kid I cried like a baby, but even after so many years the feels can still get to you. Beautiful game with a bittersweet ending.

The save file menu of the game with two completed save games that have a star on it. The first is named Tourian, the second is named Tourist and has the Hero Mode icon on it.

With that I'm looking at two complete save files now. Well, almost, because I wasn't entirely done with everything in Hero Mode yet... There is still the rest of the Chamber Dungeon stuff. Luckily, the weekend has still one more day.

Hero Status:


  • Secret Seashells: 50
  • Pieces of Heart: 32
  • Chambers: 187
  • Chamber Stones: 8
  • Challenges Cleared: 12

Link's Awakening Nightmare Diary 2

I've just beaten the Catfish's Maw dungeon, so two thirds of the dungeons are done in Hero Mode. This is going much faster than my first playthrough, of course, but I'm having a lot of fun here.

With the reduced damage input of the Blue Mail things are going much more smoothly, though I still have to return to that one Fairy Fountain in the Ukuku Prairie multiple times to heal up, because this is really the only practical space in the game so far that has a Fairy for my bottles. There are none in the trees, none under rocks and you also don't get them from Anti-Fairies. Only in the Fairy Fountains. And this is super inconvenient. They should at least have kept the apples in Hero Mode, because this is a new feature of the remake that is completely missing in this mode and this would also add more value to the Pegasus Boots here.

Plus, it's weird that there are trees now that shake, but don't offer anything. But in other places there are trees that you have to ram multiple times for them to drop Rupees. This was not a good idea, because now whenever a tree shakes, the player might think that there could be Rupees in there and then keeps trying. But nothing happens, because the tree originally had apples or a fairy, which won't appear in Hero Mode... This is a small issue, but not a good design choice. At least the Rupees should always drop immediately.

Anyway, I've noticed this already during my Normal Mode playthrough with the Red Mail, but it doesn't seem like the temporary power-ups and the mails are stacking any longer. Either that are this a minimum damage input and a maximum damage output... But for example the Moldorm fight always takes two hits now, no matter what I do. And if I pick up a Guardian Acorn and now get hit with the Blue Mail, I still take at least half a heart damage. There don't even seem to be quarter hearts in the remake. There weren't quarter hearts in the original either, but there only every second hit would only damage you with the increased defense.

Also, neither the Guardian Acorn nor the Blue Mail reduce your fall damage. It's one heart per pit fall, baby. Speaking of, there is this nasty Piece of Heart now in the Pothole Maze...

Link standing above the Pothole Maze, the spot of a new Piece of Heart is right below him

It's right at the end of the "maze", but it hides behind a gap of two holes. But of course you don't want to return there after getting the Pegasus Boots, so you try. And you make it. But then you're potentially trapped, because for the jump back you don't get the same momentum. You can still get back somehow, but it's potentially a death trap, especially in Hero Mode.

Otherwise I can confirm now that you're getting the Secret Seashell Chamber from the Tail Cave together with the Key Cavern chambers in the Chamber Dungeon, even if you haven't found the seashell yet. This time I didn't go there early, instead I went there on my way to Mabe Village with Marin...


Link and Marin head to the Tail Cave

More Fun with Marin


First of all, the kid near the Weather Vane really has his texts screwed up. When Marin is still in Mabe Village before you go to Animal Village he tells you that she likes to hang around the beach. And once she's at the beach, he asks you where you have left Marin... It's like his dialogues got shifted. This isn't a big deal, but they still need to patch this eventually, because this way the player might not know where to look for her.

But once you found her it's fun time. This is still so extremely adorable and I hadn't even seen the funniest part yet. Whenever you jump across a big abyss, like next to the house of the bay, Marin follows you easily. She doesn't need any Roc's Feather or Pegasus Boots, she doesn't even have to take a run-up. She makes a standing long jump and this looks so hilarious... :D

I also took her to the Southern Shrine this time, but of course she doesn't pay any attention to what the Owl is saying. She only is paying attention to Link...

Link and Marin in front of the Southern Shrine. Marin looks at Link and Link looks at the incoming Owl.


That one Mountain Cave...


Overall I love the new warp system, how it makes getting around Koholint so much more convenient. But I still don't get why they didn't put a warp point right after that one mountain cave that I've crossed over a hundred times in my life now. Here, please put a teleport right here:

Papahl eating the Ananas in the Tal Tal Mountains

This would be the perfect. If you got there early before doing any of the Animal Village stuff, you wouldn't have went there for nothing. You could just activate a teleporter and then quickly return here later, once you've opened the Angler's Tunnel and got the Ananas for Papahl. But this way the game still forces you to go through the same mountain cave again and again and again...

It's potentially even worse in Hero Mode. If you want to heal up inside the Angler's Tunnel, you now will have to leave the dungeon, because there are no helpful Anti-Fairies there or flying hearts. (This even leaves a weird spot in the chamber in the northeast corner, where there is a single space in the water with nothing above it. If you have never played the normal version of the game, you will probably find this suspicious. But the answer then comes from the Chamber Dungeon, where this chamber still has the flying hearts...)

Anyway, let's say you want to heal during the Angler's Tunnel. Then you get out of the dungeon, teleport to the Ukuku Prairie, go to the Fairy Fountain, then teleport to Dampé and get all the way back through the mountain cave yet another time... Come on, Nintendo / Grezzo! Just put one more warp point there, please...


After Angler's Tunnel


So, this has always been a great moment in the game for me when it came to side quest stuff. If you've left the Angler's Tunnel, you would not only get a nice warp song, but also two more Heart Pieces for another Heart Container, as well as enough Secret Seashells for the L-2 sword. And I'm happy to say that this is still exactly the same in the remake despite all of the additions of Pieces of Hearts and Secret Seashells now.

That one Heart Piece in the Kanalet Castle moat still gave me an extra Heart Container. Of course there are three more sunken Heart Pieces now, but normally after leaving the Angler's Tunnel I usually go to the one flooded cave and then to the moat, because it's all right there. And this is still true for the remake.

I was a little bit worried that there aren't enough Secret Seashells to get the Koholint Sword before the Catfish's Maw in the remake and I wanted to find this out. Of course I could have just done the math after my Normal Mode playthrough, but this way it was more exciting. But after I was done raiding near the hen house (and yeah, you have to go through the mountain cave one more time for this thanks to the missing warp point... uggghhhhh), I was looking at 39 Seashells.

At first I thought I could be getting one more shell from the fishing. However, only the Cheep-Cheeps start appearing after the 4th dungeon in the Fishing Pond and this can get you another Secret Seashell, but it doesn't seem like they can grow big enough for the 2nd seashell...

By the way, it's entirely random what fishes might appear. The blue light tells you that either a Cheep-Cheep, a Blooper or an Ol' Baron is in the pond. But since there were only Cheep-Cheeps available, the blue light rarely ever appeared for me and I had to go in and out CiaoCiao's dog house to let the RNG do it's work. That's like the fishing ponds in Majora's Mask 3D all over again... Why not always keep all the special fish, once they are unlocked?

Anyway, even though the fishing couldn't give me what I wanted, I was simply forgetting about two seashells at the moment, which were both quite interesting...


Well, this means you can 41 Secret Seashells before Catfish's Maw, which is enough for the better sword. Yay! It would have felt wrong to play the fifth dungeon without some sword upgrade. It's not like I never did this, but at this part of the game it's starting to get annoying, whenever enemies tank two hits.

I also wanted to see what happens, if you get multiple seashell rewards at once, so I didn't return to the Seashell Mansion after the Piece of Heart in the beginning. And... you simply pick all the rewards up one by one, where in case of the sword you won't be standing on the pedestal, but right next to it.

Otherwise I noticed how the Mermaid still gets angry, when you dive in front of her. But since she isn't looking for her bikini top any longer, she gets afraid that you could be stealing a scale from her without giving her what she wants first. Link is such a naughty boy!

Oh, and similar to the trees that had fairies or apples, the special Goomba spots in the tunnels might also feel weird / pointless in Hero Mode:

a Goomba in a small alcove above an underwater section in the Cat Fish's Maw

Normally you get a heart from jumping on top of a Goomba, but not in Hero Mode, so you can completely ignore these spots...


Hero Status:


  • Secret Seashells: 41
  • Pieces of Heart: 23
  • Chambers: 90
  • Chamber Stones: 2
  • Challenges Cleared: 6

Friday, September 27, 2019

Link's Awakening Nightmare Diary

Link standing in front of Moldorm's lair in Hero Mode

So, what do you do once you've finished your game of Link's Awakening? Play through it again, of course! And this time in "Hero Mode"!

Link's Awakening always has been one of the most replayable games for me. Not because it allows for so much experimentation (sadly, a lot of the ingame progress is tied to certain events), but because everything about it is so charming and enjoyable. It's also a very compact game, where you can easily complete it on a free weekend. Which is what I'm planning to do.

But this also means less blogging and more playing. My first playthrough took quite a while, because I was so invested in finding out pretty much everything there is to the remake and sharing all my thoughts here. Now I will be more focused on an efficient playthrough. I will also try to get all the new Pieces of Heart and Secret Seashells as early as possible, which makes sense in Hero Mode.


Enter Hero Mode


Well, overall this is your standard "Hero Mode" as you know it since Skyward Sword. You receive double damage and you won't find any hearts, apples or fairies (the latter only in Fairy Grottos). Well, there are still ways to get hearts and that's in the shop and the Trendy Game... You might even consider using this offer early on, but once you have access to more healing opportunities, this will be useless as ever.

But as always this whole Hero Mode thing makes the early game challenging, but then not very much... The game still has its death counter and secret ending, which doesn't go together nicely with a mode, where you might accidentally die early on. So, you want to save your game on every step and then reload, if necessary, to keep that nice 0 on your file.

(Apropos file, whenever I'm saving my game now I'm worried that I might accidentally overwrite my 100% Normal Mode file. It would have been good, if the game still shows you the file number before you confirm...)

So, I'm personally not a big fan of this mode. What they could have done is applying the "+Monsters Effect" on all the dungeons now and calling this "Nightmare Mode". At least then it would have felt somewhat more unique when compared to other Zelda games in the recent years. Plus, fighting lots of monsters at once can be lots of fun.


First Steps


I've been a little bit worried that with the updated mini-game my Mabe Village grind after the Mysterious Woods will be too lengthy. Whenever I've replayed the original GameBoy game, I didn't go straight to Level 1, I used the money from the woods to clear the fishing mini-game first and then I played the Trendy Game until I could afford the Shovel and Bombs...

So, with Hero Mode in place naturally I wanted to do the same and I was positively surprised that this went down even quicker and I got more out of it. For starters, not being told how the controls work between every single fish certainly helped. And now that I know how you do the fishing I quickly got both Heart Pieces, the middleweight lure and of course the first Fairy Bottle.

And then I got the Yoshi Doll, the CiaoCiao figurine and the Piece of Heart from the Trendy Game, as well as enough Rupees to buy the Shovel already. Bam! This is much better than in the original and it also already got me an additional Heart Container before the first dungeon. I like it!

After the first dungeon you can also neatly use that Piece of Heart surrounded by holes to heal yourself before the Moblin Hideout. At first I even thought that you might want to keep certain Heart Pieces for later strategically, so you can heal yourself with them if needs be. But of course this is negligible, since you can always heal yourself at the Great Fairy in the woods.

I was worried that the second room in the Moblin Hideout would give me trouble, but then I remembered that Link's Awakening always has been a game with powerful items other than your sword. You can just quickly burn them all up with Magic Powder for an easy solution.

Also, the Guardian Acorns feel like proper rewards in Hero Mode now. Well, I'm probably one of the few guys out there, who actually enjoy the little music of the power-ups (especially now in the remake with the boost effects), but in Hero Mode this can be very helpful. It doesn't work on holes, though. If you fall down somewhere, that's one heart gone.


Of Cream and Bottles


The Hinox again marks this point in the game, where you make it to break it. You have to play it carefully with the guy, because in the remake he loves to spam his grab attack, which is going right through all of your attacks. But at least he's now easy on the bomb spam. So, a good combo of Roc's Feather and Spin Attacks takes him out and overcomes the biggest hurdle for not dying in the game.

With the Power Bracelet in hand you can always go for the "leave Bottle Grotto in the middle to get Secret Medicine and another Heart Container" strategy, which I've done quite often on the GameBoy, because I've been afraid of the Genie boss. He isn't as scary in the remake any longer, however, especially if you use Aonuma's E3 methods, where you stay close to the boss.

But it's still a good idea to get the Secret Medicine in any case and the heal from Crazy Tracy is welcome as well, because they have removed the fairy from the pots near the end of the Bottle Grotto. They probably even have removed all fairies outside of the Fairy Fountains, so the Fairy Bottle sadly is useless up until getting the Bombs. Plus, those little fairies don't automatically heal you, you actually have to use the bottle to set them free this time, which is different from all other Zelda games, where the fairies worked exactly like the Secret Medicine in this game...

I also took BowWow for some longer walkies, where He helps traversing the Ukuku Prairie with its annoying enemies. And the scene where Kiki wants to fight with him is absolutely hilarious.


Early Chamber Dungeon


After Level 2 I wanted to try some things of what I already can do inside the Chamber Dungeon. I've saved some of my dungeons from my Normal Mode save file on various amiibo, including the infamous Labyrinth of Tourian, and I wanted to see what happens if you try to play them as early in the game...

Turns out this actually works. What the game does here is warn you that you're playing chambers you don't have yet. And it sets your inventory to whatever the creator of the Chamber Dungeon has been using. So, it looked like this:

A completely filled inventory in the Chamber Dungeon. The borrowed items are marked with a blue background.

The blue items will go away once you leave the Chamber Dungeon, but it's certainly possible to play it with them. And this is an interesting solution. I would have expected that it simply blocks you out of playing or so. But this way even online sharing of dungeons could work nicely.

Oh, but the additional tab space actually gets used for the amiibo dungeons. So, that's reserved already, but they could always make the tabs smaller or so...

Another thing that instantly caught my attention is this one:

A flying heart in the tunnel chamber from the Tail Cave.

Yes, you can still find hearts in the Chamber Dungeon. I guess, they wanted the chambers to be identical between modes. After all you can play a dungeon that was created in another mode... But then there's even less of a reason to not apply the "+Monsters Effect" for the rest of Hero Mode. The chambers you get are then the variants from Normal Mode, but you of course always add the "+Monsters Effect" yourself. (Once you got it... after the end of the game...)

Oh, and I can now indeed confirm that the first Chamber Stone from the Trendy Game gives you the three-way Genie chamber.


The Power of Color


My next goal was again an early visit to the Color Dungeon, where it really has some qualities that I'm missing from the Chamber Dungeon. The music is awesome and would fit the Chamber Dungeon very nicely. And keys falling down from the ceiling instead of the slooooow treasure chest animation really feels so good in comparison. You just pick them up, where it makes a little beeping sound and you go on. So good, so fast! Man, I wish the Chamber Dungeon would do that instead of throwing all these treasure chests at you, which wastes way too much of your time.

Anyway, it felt a little bit risky to visit the Color Dungeon so early, because its bosses can be quite dangerous, if you're not careful. Luckily, I could now get a fairy from the Fairy Grotto in Ukuku Prairie, so this helped.

But I'm not a fan that mini-bosses don't drop fairies any longer. I would be okay with Anti-Fairies or Sparks not giving any, because this trick always made the game too easy, but after a mini-boss fight you potentially want to heal up. Not getting a fairy doesn't make the game any more harder here, it just makes things more tedious. Because now I had to leave the dungeon, go down to the Ukuku Prairie and get healed by the Great Fairy... after both mini-bosses! And this sucks.

Link in the Blue Mail standing in front of the Fairy Grotto in the Ukuku Prairie. A Pincer is trying to attack him from a hole to the left.

At least it was worth it... I now have the Blue Mail and from this point on Hero Mode should get a lot easier, because it negates the double damage. I also enjoy playing the game a second time with a different tunic, which I also did with Link's Awakening DX on the Virtual Console. Of course you can always change it (even back to green now), but once I've picked a tunic I usually stay with it for the rest of the game.


Hero Status:


  • Secret Seashells: 15
  • Pieces of Heart: 11
  • Chambers: 63
  • Chamber Stones: 1
  • Challenges Cleared: 2

Link's Awakening Dream Diary, Level Z: Chamber Dungeon

It has been a week since the remake of The Legend of Zelda: Link's Awakening gotreleased for Nintendo Switch and during this time I've tried to play as much as possible. Of course the blogging here takes a lot of time, but it still speaks for the remake that it could entertain as long, considering that I would only need about one evening to complete the GameBoy (Color) version.

But the remake has a little bit more to do, mainly thanks to the Chamber Dungeon and the expanded mini-games. At first I've returned to the latter, because I wasn't completely done with the fishing and I couldn't even complete the Trendy Game before defeating the final boss...

Link near the Trendy Game

It's nice that the game now saves after the credits and gives you a star on the save file, but the post game feels very pointless. At least the post game in The Minish Cap had a clear purpose: you would then get the figurines of the final boss and more. Here it would have made sense, if they had added some of the Wind Fish's Egg chambers to the Chamber Dungeon, but they didn't. All the post game does is letting you obtain the BowWow figurine... (And it shows the totals for Pieces of Hearts and Secret Seashells now in the Memories menu, similar to Breath of the Wild.)

Completing the Trendy Game also gives you a Chamber Stone with the +Monster Effect, which is really awesome, while the owner now also calls you "champ" and lets you play for only five Rupees. Not that playing at this point would have any value... But it's kind of weird, how it locks all of this behind defeating the final boss.

Link standing in front of BowWow

As for the fishing, I was still missing the Blooper and that one was a pain to get. Easily the hardest of the five different fish. To be honest, I still don't get the thing. From what it seems you have to reel in fast when it dives down and let go when it dives up... This worked for me, but it was still vibrating madly most of the time, where it constantly felt like I was doing it wrong. But even when I let the Blooper go, it would keep vibrating badly... Very weird.

The funny thing is that this scored me the heavyweight lure. It's like the game had it backward and expects you to catch the Blooper before the Ol' Baron. But for me the Ol' Baron was much, much easier to catch than that annoying Blooper. And getting the heavyweight lure now is completely pointless, because I've caught the big blue fish. You can catch every fish with every lure anyway, they only seem to affect how fast it sinks.


The Golden Challenges


So, the final part of the game was clearing all additional challenges from Dampé. They are "golden", because you get a gold Rupee worth 300 from each of them. That's the only reward you'll get here, but at least this pays for the remaining Chamber Stones in the shop.

The challenges were quite creative with different restrictions and shapes. I really like the different forms here, where you have dungeons that look like a sword, a shield and a bow. They even had thematically fitting restrictions, where the "Crafting a Shield" challenge only gives you five hearts and the "Bows > Swords" challenge doesn't let you use your sword.

With the latter I tried actually using some rooms, where you have to use your Bow. Most times it's "Boomerangs > Bows" in this game, but there are exceptions, like the one room from Level 8, where you have to shoot an Eyegore statue with your bow. Or the Gohmas. Without the sword you actually have to use your Bow, because no other weapon seems to damage them.

Anyway, I also liked the "House of the Hinox" challenge quite a bit. It uses all three variations of the Hinox in a circle and restricts you to three minutes. Of course I only made a 3x3 dungeon here, but even small challenges like this can be fun. In fact I prefer doing some smaller challenges over the large, lengthy ones, where the additional challenges had plenty.

The "Back to Square One" challenge was interesting, because it makes somewhat clear why you can't connect the tunnels yourself. If you could, challenges like this would be way too easy, because you could simply connect the entrance with the black hole and Blaino chambers, which might potentially send you back. Of course you can still make this challenge quite easy by using as few chambers as possible, enough that the tunnels connect the right way from a big distance.

Apropos tunnels, a lot of people seem to have problems with the "Nothin' but Stairs" challenge, but I had this figured out within few minutes. Maybe I was just very lucky, but here is my solution:

a solution to the Nothing but Stairs challenge

And this turned out to be one of the most interesting Chamber Dungeons to play, because you had to figure out how all the tunnels connect. It had a randomizer feel to it, where it certainly would be fun to play dungeons that the game has randomly created for you.

The "Skull Arrangement" dungeon then basically led to the boss rush that I kept talking about. At least it had a total of eight fixed boss rooms in there and invited you to add the rest, which I did. I think the main reason, why they didn't force all bosses on you, is that you're getting certain boss chambers from Chamber Stones, so you're not guaranteed to have all these rooms yet. Of course a better solution would have been to not lock these chambers that way. Or simply add them as fixed chambers to the challenge, whether the player has them or not...

But I love how this dungeon mimics the classic Death Mountain dungeon from the first The Legend of Zelda game. Dampé even says that this shape feels familiar...

a map of the Skull Arrangement challenge

The last challenge is called "Supreme Shape" and looks like the letter Z. There was also a "Z" dungeon in the classic 2nd Quest, though this one here is certainly bigger. After the boss Infestation from the previous challenge, I decided to go mainly with puzzle rooms for that one as a nice and relaxing final challenge. (Or you can do just something like this.)


Chamber Stones and Plus Effects


With all the money I could finally effort the last two Chamber Stones from the shop. There are seven in total, which accumulates to 8960 Rupees... Wow, and people thought the Bow was expensive. Well, these last two Chamber Stones gave me alternative chambers for Blaino and Hot Head.

I've tried to compile a list of all Chamber Stones with their locations and the chambers they give you:


14 in total seems like a weird amount, but I've checked with GameFAQs that this is indeed the final amount, even though there are rumors of a 15th one. However, as you can see in the list, you only get Chamber Stones from the island's main attractions like the shop and the mini-games. They aren't found in the wild, though I personally would have replaced the three Secret Medicine chests with Chamber Stones from the shop to add some of them to dungeons as well.

I've also played around with the Plus Effects somewhat and my favorite is certainly the "+Monsters Effect", which I got from the Trendy Game earlier. It's icon is very misleading, because when I first saw the effect, I thought it would make it rain Buzz Blobs. What it actually does is increasing the number of existing enemies in a room, often doubling it:

the northeast room of the Bottle Grotto, but with four Pols Voice

So, the Buzz Blob icon is kind of misleading, because there are no Buzz Blobs in dungeons... But the effect is a lot of fun. It often feels like that is what the number of monsters should have been in the first place. Of course the game stayed very faithful to the original, so the enemy placements are largely the same, which is a good thing.

But the original was very limited by the GameBoy's power. Try experiencing more than four enemies at the same time on the GameBoy, if you thought the frame drops in the remake were bad... But the Switch version certainly allows for many more enemies at the same time and it really feels good to blow through them all. Hero Mode should have made use of this mechanic for the entire game!

As for the other plus effects, the "+Shadow Link Effect" sadly isn't much fun, because the fights aren't as dynamic as they used to be in the Nintendo 3DS Zelda games. There you could damage the Shadow Link with your items as well, but this doesn't work here. Only the sword works, where you often have to wait for the Shadow Link to do a Spin Attack, which leaves him vulnerable for a split second. He also hits like a truck, but this may be because he mirrors my equipment, where I'm now getting hit by the power of the Red Mail and Koholint Sword combined.

The "+Wallmaster Effect" works similar to the Shadow Link, but with the difference that the Wallmaster keeps respawning after you've defeated it. Which is quite annoying, but at least it doesn't follow you into boss chambers...

The "+Rupees Effect" can yield quite different results, similar to the extra chests in dungeons. Sometimes I'm getting a good amount, other times it's most green and blue Rupees... But overall it doesn't hurt to place it somewhere into your dungeon. You can only use it once per arrangement, though, like the "+Hearts Effect", which is probably the most uninteresting effect (I wonder, if it works in Hero Mode, though).

The "+Bombs Effect" is fun to use on certain mini-bosses, mainly the Dodongo Snakes. They might swallow some of the fallen bombs, which saves you some time. It also helps with the Golem or the Hinox.

Anyway, after getting all the things, here is a shot of my inventory at the end of the game:


The Labyrinth of Tourian


After clearing all 24 challenges it was time to make my own. Time to build the ultimate dungeon, where I wanted to create something under the following conditions:

  • Use all 64 squares.
  • Use all chambers with bosses and mini-bosses, as well as one chamber with Shadow Link.
  • Use the +Monsters Effect, where applicable.
  • Divide the dungeon into small, separate sections, where each section represents a single dungeon of the game. The first section would be based on the Tail Cave with the chambers for the Rolling Bones and Moldorm boss fights present and the next the Bottle Grotto with its Hinox and Genie fights. You go from one section to the next via tunnels.

The last requirement is what made this tricky and really turned this into an actual dungeon puzzle, even more so than the tougher challenges. But sadly this wasn't entirely possible, because not all dungeons have (enough) stairs available. So, I had to take some liberties, where there is one big section, which combines the Key Cavern, the Color Dungeon and the special amiibo chambers into one (this is also where I put the Shadow Link), as well as a combined section for Levels 4 and 5, because Level 4 simply doesn't have many chambers to offer.

So, this is what I came up with in the end. Behold, the Labyrinth of Tourian:

the Labyrinth of Tourian in the menu, all 64 chambers are filled

the Labyrinth of Tourian with the tunnel connections shown in the arrangement menu

I also couldn't include all unique boss chambers, where this is missing the one for the Chief Moblin and the Dodongo Snakes chamber from the Turtle Rock dungeon. But the Dodongo Snakes from Level 6 are in there and the Turtle Rock area has all of its other mini-bosses, including a Blaino, who defends the Nightmare Key, if you get all chests in order. There is also a Wallmaster right before him, which certainly was a dumb idea. One mistake with these guys and you will get right back to the start of the dungeon. Funnily, Blaino's chamber lies right next to the entrance, so you would only get thrown off by one square, but it's a loooong way back to him.

This is a creation I would even share online, if the game had the option. But I will certainly save it to my new Link amiibo, while the solution to the "Nothin' but Stairs" challenge goes onto my 8-Bit Link amiibo.

Another complaint would be the music. While I don't dislike the Chamber Dungeon track, it gets somewhat repetitive after playing a dozen of dungeons with it. Ideally, you could select the music track for your Chamber Dungeon, where I probably would often choose the Color Dungeon music, because this would fit the whole thing more nicely.

But overall this seems to be a fun addition, which is perfect for whenever I want to play a little bit of Zelda. You know, when I want some dungeon action, but don't have the time to replay an entire Zelda game, even such a short game as Link's Awakening. Previously I would use the multiplayer Zelda games for that, but there you have to control multiple Links in singleplayer and you're always restricted to one item. And of course after some time you know the levels in and out and it gets boring as well.

This will be perfect for this. Of course I also know the dungeons of Link's Awakening in and out, but that has never stopped me from replaying the game or enjoying its contents. So, mixing together the dungeon rooms to play whatever I want at any time is sensational. If I could show this to myself 22 years ago, my past self probably would freak out in excitement and then spend twice his age of time in eager anticipation for this remake. What a great time to be a Zelda fan!


Final Status:


  • Secret Seashells: 50 (24 old + 26 new)
  • Pieces of Heart: 32 (12 old + 20 new)
  • Chambers: 193
  • Chamber Stones: 14
  • Challenges Cleared: 24

So, this is it, I have 100% completed the remake of Link's Awakening, at least in Normal Mode. Some ideas for improvements and maybe a thorough review will follow soon. I will also start playing Hero Mode next, where I will continue the Dream Diary – but with pure focus on the Hero Mode changes and replaying the game, since the 11 posts so far should cover most of the remake's changes extensively.

Tuesday, September 24, 2019

Link's Awakening Dream Diary, Level 9: Wind Fish's Egg

...EGG.... The Egg on the mountain calls!

All Instruments of the Sirens are in my possession yet again and the Wind Fish is waiting for me to play them, where today is the day of truth. What will be that last Chamber Dungeon challenge? What will be the reward for getting all Secret Seashells? Will the Wind Fish's Egg be expanded? Well, I wasn't going to enter the latter without all Heart Containers and Secret Seashells, so the first two questions had to be answered first.

Mainly, this was about finding the last four Secret Seashells, hidden somewhere on the entirety of Koholint Island. But at first I had to revisit the Trendy Game and Chamber Dungeon one more time...


After Dungeon Routine


Normally, after finishing the Turtle Rock dungeon, if you had done all side quests up to this point, all that was left to do was going straight for the Wind Fish's Egg to finally finish the game. You would potentially be missing one final dialogue with Marin then, however, who doesn't re-appear in Mabe Village until after Level 8.

So, it's a good thing that the Trendy Game lures you back into Mabe Village after every single dungeon now, including this one. The Pokey figurine was next, so as expected the BowWow figurine is the last one you will get. However, it wasn't available just yet, but this would be explained later...

Back to the 
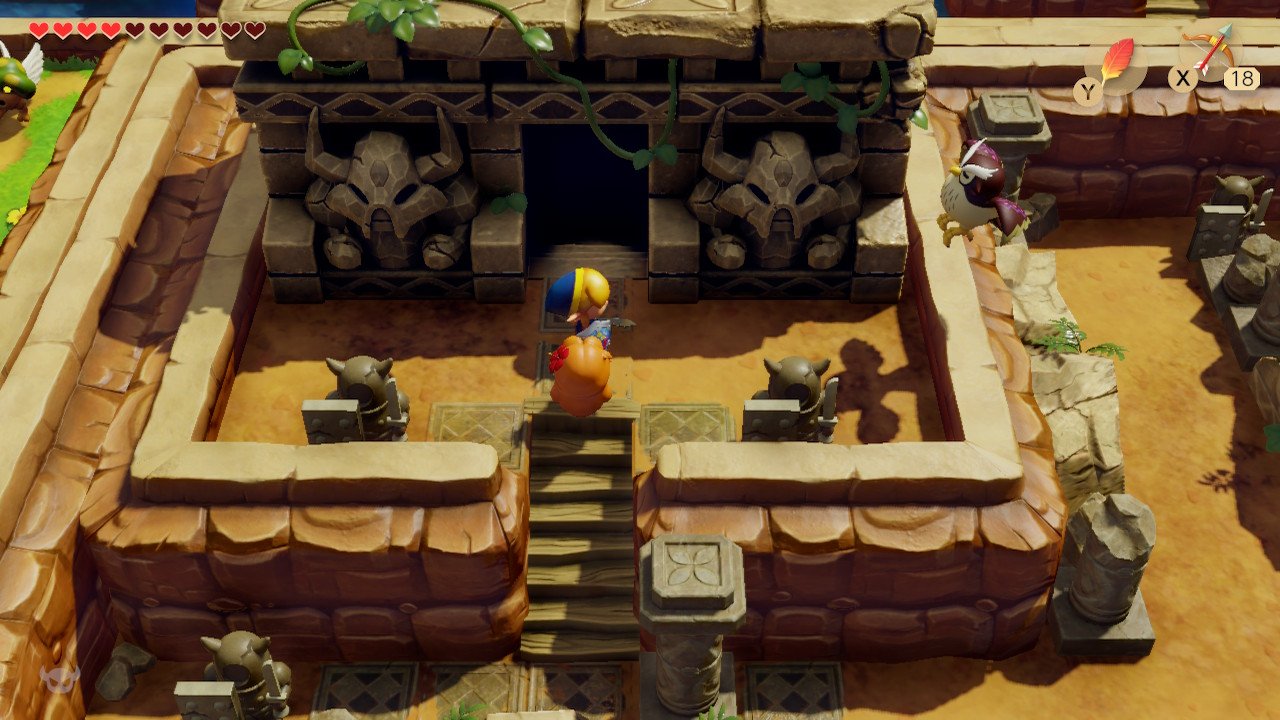
Chamber Dungeon, "Ticking Clock" was yet another "Drabland Challenge", which can be cheesed easily by only using the simplest rooms possible. And I have to say, when Dampé gave me that Heart Container (together with the "+Wallmaster Effect" and a unique Great Fairy chamber in the Turtle Rock visuals) I felt a wave of disappointment overcoming me. "That was it?! Really? This whole Chamber Dungeon thing is really ending on a low note..."

And then Dampé saw the massively underwhelmed expression in my cute, little Toy Link face and threw a set of twelve more challenges at me! All of them with interesting new layouts and challenges. It's like the twelve challenges before were just the basic tutorial and now I'm really hyped to get into the world of Chamber Dungeons for real. I'm guessing that this is even where I will be getting the rest of the plus effects as additional rewards.

This is also ideal for people, who don't really care for the whole feature. You do the basic challenges in the easiest way possible to get all the rewards, like the Fairy Bottle or the Heart Container, and then move on. But if you liked the Chamber Dungeon so far, there's a whole set of new dungeons for you to build.

Also, the tabs on the top would allow for one more space... Maybe challenges via DLC or free updates are really planned here? I mean, this is the perfect hook for new content. It shouldn't be hard to set up a challenge and the possibilities are near endless by adding both more challenges and chambers. (Update: the additional tab space is used for the amiibo dungeons, of course.)

Apropos chambers, the Turtle Rock dungeon added over 30 of them, easily topping the Color Dungeon. But it always has been quite "chambery" and offers lots of different mini-boss rooms. They even put in one chamber for the Dodongo Snakes under the balcony, where the room has a staircase added to it.

Dodongo Snake chamber from Turtle Rock with an elevated area

But this makes it even weirder that the Dodongo Snakes from the Key Cavern didn't get such a chamber. There is no basic variants of the Dodongo Snakes in my list of chambers, only the chambers from Level 6 and 8, which have a different room setup (holes and the balcony). Might this be a bug? An oversight? I will have to investigate, because except for this chamber absolutely all occurrences of mini-bosses in the dungeons are available. This seems rather weird.

And it seems like a majority of the Chamber Stones are coming from the shop... There was just now a 4th, a 5th and a 6th one, again 1280 Rupees each. The first one gave me a three way variant of the cracked floor chamber from Level 8. The second a variant of the Dodongo Snake balcony chamber above. And I'm still too poor for the 3rd, but I'm starting to think that each chamber stone is actually connected to a specific chamber, because why else would these not be for purchase earlier...?

Well, there is lots and lots to do here now for later, but with the last Heart Container in my hands I wanted to focus on the last four seashells first and then finish the game, before I do more dungeon building...

But for the moment I also thought the last seashell will be gotten from one of the new challenges, because in the memories on the map there was only one seashell icon at Dampé's Shasck and it was aligned with the left of the two Heart Pieces there. So, it looked like there could be another one. And so far every mini game had exactly two Pieces of Heart and Secret Seashells to offer, so why not the Chamber Dungeon?

But after clearing two of the new challenges I realized that you are "only" getting 300 Rupees from each. It would explain why the shovel icon on the tab is golden, even. This is perfect for buying the expansive Chamber Stones in the shop, but it won't help me with my seashell problem. I wanted to save the remaining Chamber Dungeon stuff for later and not do it all now in false hope of getting what I was looking for. So, I checked with a guy, who already had all 50 seashells, to confirm that the last seashell isn't with Dampé to finally move on...


The Final Four


Four Secret Seashells had completely evaded me during my playthrough and it's now time to honor them properly. After all I didn't spot any of them while re-exploring Koholint in its beautiful HD rendition.

If you're using the Seashell Sensor, finding all Secret Seashells might be trivial, save for the ones you get from mini-games. But I haven't been doing this. I turned that thing off the moment I got it and I was doing the seashell search the old school way.

And this really took me back to my childhood and the joy of discovering all these Secret Seashells, while exploring every nook in the island with the utmost curiosity. Back then the internet was still in the fledgling stage, so you didn't have instant access to guides or whatever. I knew that 20 Secret Seashells would give me the better sword and I knew that there were more than 20 Secret Seashells to find, but I didn't know how many there were in total, because once you get the better sword, all other seashells will vanish or be turned into 20 Rupees.

So, one time I decided to not get the sword and see, how many I can find, where I turned Koholint completely upside down. I cut every bush, I dug on every spot of earth, I rammed into every tree, I dived in every square of water, I did everything imaginable. Because I loved the game, because it was entertaining for a child and because I really was curious what I could find. This is probably even why I had this fixation on certain spots, like that one rock here or that one rock there, where finally they've added some seashells to them in the remake, over 20 years later.

Link at the ghost's grave. He says not to sprinkle Magic Powder on him.

Now I was back to doing basically the same, since looking for changes in the environment or inspecting old spots of curiosity only got me so far. Well, it got me far enough, but I had to up the ante. Other than digging around and ramming trees like a madman, I even had all kinds of silly ideas for new locations, like the following...

  • in one of the many drawers
  • in one of the many phone booths
  • in the spider hole near Kanalet Castle
  • from talking to the ghost again
  • under a tombstone
  • under one of the new wooden boxes for the Hookshot
  • from one of the Zoras, because they are much trickier to kill now
  • from playing the Ballad of the Windfish to one of the bunnies

Spoilers, it wasn't any of that. And the first missing seashell was so simple, it even hurt a little...


The next two weren't as simple, so I did the good old "stare at the map and see where the gaps are"-method that worked well enough for the Koroks in Breath of the Wild. So, which areas didn't really have any Secret Seashells to offer? In my case those were a big chunk of the Toronbo Shores, the Goponga Swamp, the cemetery, a big chunk of the Tal Tal Heights, inside the walls of Kanalet Castle, south of Animal Village, the area around the hen house and the Signpost Maze.

I've checked the swamp and cemetery multiple times already, where both are host to dungeons, so it's not like they were in the dire need for something new. And Kanalet Castle already has the five Golden Leaves, so I didn't really feel like there would be anything else there either (I still went looking). Well, I was more lucky in a certain spot...


For me it was also clear that there needs to be a new Secret Seashell in a tree somewhere, because the Pegasus Boots didn't really get anything more to do in the remake. And during this "investigation" I've also noticed how certain trees now drop Rupees, if you ram into them (multiple times), including one of the bigger palm trees in the Yarna Desert. That one seemed rather random, because the other palms wouldn't move one bit. But this gave me an idea...


So, only one Secret Seashell remained. I found the previous three seashells pretty quickly, it only took me about one or two hours, all without the Seashell Sensor. The last one then has completely eluded me for an entire evening, where I've went through the entire overworld multiple times without finding anything. Most of the above list came from desperate attempts at finding something...

I even allowed myself to briefly use the Seashell Sensor in certain locations, just to be sure that there really isn't anything there... But there was seemingly nothing else to be found in the environment, so I've came up with the conclusion / theory that it's either hidden in some dungeon or gotten from a NPC as a reward for something.

Well, I had previously complained that they didn't hide any new Secret Seashells in dungeons, especially since you now can dig in a majority of them, but in hindsight this felt like a bad idea from my end. What if you're missing on seashell, but can't find it – like in my case? They can't expect you to run through all dungeons again with the Seashell Sensor, so they'd have to be inside treasure chests, which are marked on the dungeon map via the compass. I even went back to the Eagle's Tower to finally open that chest with the Secret Medicine just to be sure that they didn't change it to a seashell or Chamber Stone, but it's just another blocked chest.

(I actually would have replaced these three Secret Medicines with Chamber Stones by the way. This would have been much better than cramming them all into the shop. And it would feel more rewarding to get these three chests.)

But after the first of the final four seashells I kept having this feeling that the last seashell would be very similar. And something kept bringing me back to the same area as seashell #1. Call it intuition...


Happiness overcame me. Finally I got all Heart Containers and Secret Seashells. Finally I could move on to the final boss. And finally I would learn what you get for all 50 Secret Seashells in the remake. It had to be something special. It had to be an upgraded Spin Attack or another bonus for the L-2 Sword. I couldn't just be another Chamber Stone, right? Right? Of course not...


Wind Fish's Egg


In any case, I was now ready to finally finish the game... to play all eight Instruments of the Sirens for the first (but certainly not last) time in this overall quite excellent remake.

Link playing the eight instruments of the Sirens in front of the egg

And yes, I briefly had hoped that they might do something with the Wind Fish's Egg "dungeon". If there was a place, where they could be creative and add to it, without changing what was already there, then it would have been this place. You basically just keep jumping down holes, where between the infinite maze and the Nightmares there could have been another floor or two.

One quick look at the map destroyed this hope, however, because there wasn't one. And if there's no dungeon map, then there's no dungeon...

But the final boss fight got altered on some ends to make it harder, which is cool. The slime in the beginning is now much more aggressive, while Ganon does a better job at blocking with his Trident. The Lanmola doesn't die from one hit of the Magic Rod any longer and the same goes for Deth-I and the Boomerang. The Boomerang still works, but it takes quite a few hits to kill it. Oh, and it doesn't just play the mini-boss music in this part any longer, there is a new track here.

So, time to destroy Koholint once more, this time with an anime cutscene. Those were quite nice and faithful to the original. And I fully expected this to happen after the intro, where they translated the cutscenes from the GameBoy version into this anime style. But if they are going to remake the Oracle games, there will be more of these anime cutscenes for sure, because there those also happened in the middle of the game.

a cutscene shot of Koholint Island. You see the island from its back as it disappears.

The secret ending at 0 deaths seems also to be in tact, so it's the same old, just prettier.

Link standing in front of the opened Wind Fish's Egg

Interestingly, the game now lets you save after finishing it. Like with Breath of the Wild, this adds a star to your save file and it refills all your Magic Powder, Bombs and Arrows for some reason. You can also get the BowWow figurine then, which means you can't fully complete the game until after the final boss...

There also don't seem to be chambers for the Wind Fish's Egg. It would have been interesting to use the Nightmares as one, but you can replay those anyway at any time. The most interesting part about the boss chambers is that those let you replay bosses, which you couldn't do in the original.

In any case, there will be one final post, which will probably deal exclusively with the Chamber Dungeon. Now that I'm done with the main game, I will fully focus on that. And I'm probably missing a couple more Chamber Stones as well.


Current Status:


  • Secret Seashells: 50 (24 old + 26 new)
  • Pieces of Heart: 32 (12 old + 20 new)
  • Chambers: 190
  • Chamber Stones: 11
  • Challenges Cleared: 14