
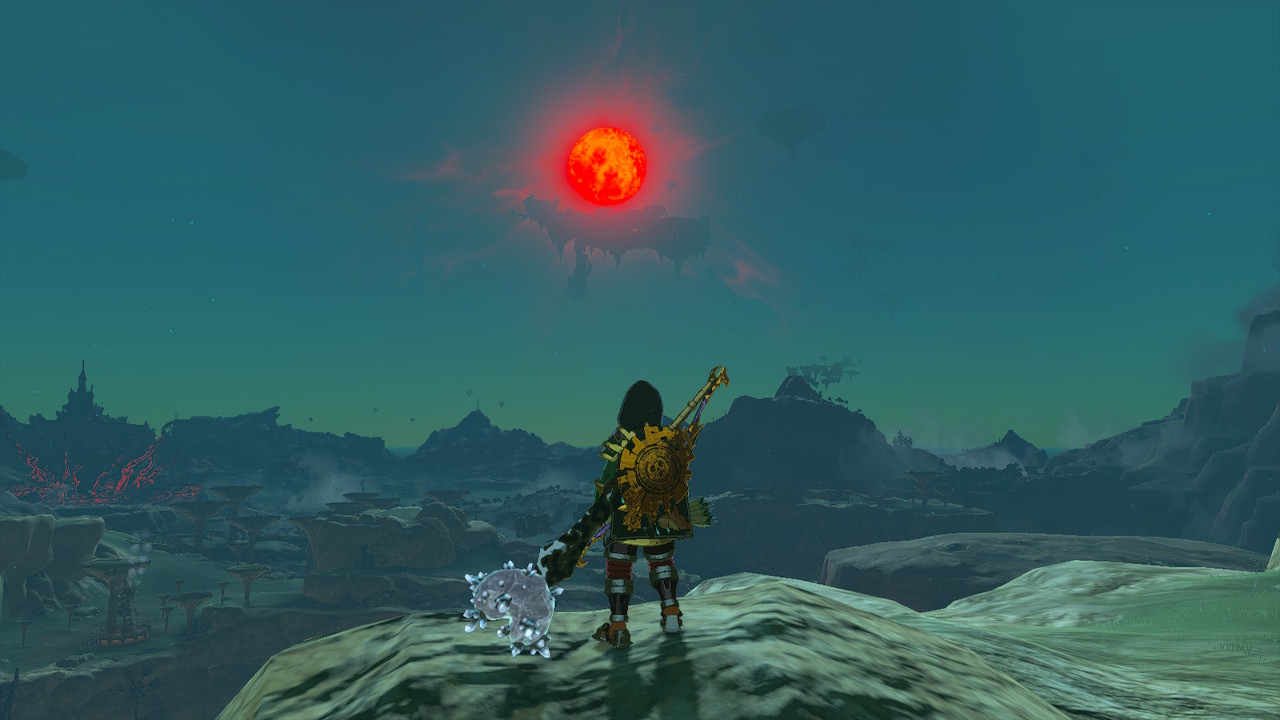
There was one small thing I wanted to do before going to the Rito, which is where I will find the last sage, and that "small thing" was beating the game. I was simply curious of what would happen if you went for the final boss without having completed all the main dungeons, so I decided to find out, on prime time Saturday evening...
This goes without saying, but big finale spoilers incoming! I will put everything in a spoiler box, so you don't accidentally catch a glimpse of anything major while scrolling through this site. I already had seen the final boss before, but I don't want to be that guy who does this to other people without warning or any precautions. So, only read the post if you've beaten the game yourself already or you don't care.
The Goal
When you leave the Great Plateau in Breath of the Wild, you immediately receive the "Defeat Ganon" main quest, pointing at the top of Hyrule Castle. The game tells you "this is where you will find the final boss, good luck with that". It's a straight-forward as it gets, where it's really up to you how much you prepare and grow stronger before you're going to beat the game. Or at least try.
Tears of the Kingdom handles this differently. The main main quest is called "Find Zelda" and there are lot of loose ends to follow here, like the geoglyphs, the four regional phenomena, and even the rumors around the stables, which all results in various other main quests and side adventures. So far the game hasn't told me where to find the final boss, but this doesn't mean that this is completely out of reach until you're done with all the other things. And you can make an educated guess right away...
Forgotten Foundation
It makes all sense that you would find Ganondorf right where you've first met him, in the Depths below Hyrule Castle. I've already went down there in the early game (see entry 6), but I've turned around once I had to face a gloomy Silver Lynel. It turns out that you can simply fly over it, but this of course wasn't necessary any longer...

I came well prepared, with lots of Gloom-healing food, where I personally like to mix Sundelions with meat, so that it both restores the greyed-out hearts and heals you at the same time. I also expected the worst, like a King Gleeok as another obstacle, since they throw the second-strongest type of Lynel at you very early. But he acts more or less as a gatekeeper, so that you don't proceed too far, only to run into a potential dead end (emphasis on "dead") later on.
What I really liked about this part was the new battle music. It has some really cool vibes to it and makes it perfectly clear that this place is special. It's truly the depths of the Depths. It's a shame that this is a bit short-lived, though, where they could have used this battle theme for the entire Depths, but then it wouldn't feel special here any longer.
The parts between the Lynel and the end aren't too threatening, where the most memorable section is for me the long, vertical stairway hall, filled with gloom and Lizalfos archers. The biggest scare then comes from a Gloom Spawn as one of the last obstacles, but it's in a pit and you can – once more – just fly over it. The game is even nice enough to offer you some Zonai devices right before.
But the Gloom Spawn will also despawn on its own, like it usually does on the surface, and now the game is being too nice here. There are points where the Gloom Spawns don't go away, for example in the cave below Lindor's Brow. That's even a place that you may find very early, potentially causing PTSD for the rest of your adventure. Why they would make it give up here is beyond me, especially since there is a clear way to avoid it.
It's still an uneasy atmosphere, because once you get down to this point the vows of the sages can't reach you any longer. So, you're all on your own from now on. At first I thought that this might be some sort of punishment for when you don't have all sages yet, but that's not it...

Finally arriving at the staircase where the game began gave me the chills. I wasn't the biggest fan of the prologue sequence, where you go down there with Zelda initially, but now I can really appreciate how the game puts it to use. Your first steps will also be your last. It's quite poetic and the Zelda series has never done anything like it before. Some games might be close to this, to be fair, like Majora's Mask, but they usually don't start at a place that's right in front of the final boss chamber. I really like the idea of this.
It also plays an eerier version of the already eerie music from the prologue during this part, which intensifies and starts to add some of Ganondorf's theme into the mix. This is just epic, especially if your journey as a Zelda fan began with the original teaser trailer in 2019, which also featured this theme.

You can now also finally uncover the remaining murals, where I didn't expect any surprises at this point. It shows how the Imprisoning War went bad, how Zelda received the Master Sword, and then the Light Dragon at the end, with a sword sticking out of her head. If some player goes down here first thing, which would be a super cool thing to do, then this probably will create more questions than answers. But it's quite perfect for going into the final battle, where those questions will be answered anyway.
I left my second Travel Medallion at this place, where it now serves the same purpose as the spot at the top of Hyrule Castle in Breath of the Wild. This allows me to quickly return to the final boss, without having to go through the Hyrule Castle Chasm ruins again.
Moving on, I love how you're going deeper and deeper, which is the opposite to Breath of the Wild, where Ganon was located at the top of Hyrule Castle. This is even something that he often does in Zelda games, so it's nice to have a different direction for a change.

Ahhh, where to land? It all looks like Gloom...!
And descending into a hell made out of Gloom, all alone by yourself, is also a lot more unsettling than anything that was ever done before in the series, at least when it comes to the final section. This really had some endgame Metroid vibes to it, like going into Phaaze.

The Demon King's Army
Before you can face Ganondorf, you will have to defeat his army first, where he sends waves of Bokoblins, Lizalfos, and Moblins at you. This is very reminiscent of the horde battle at the end of Skyward Sword, before you face Ghirahim, but even darker.
You're not alone in this fight, where your vows got taken away totally for a game reason: the actual sages in their flesh and blood will join you, which everyone who has watched the final trailer will see coming from a mile away.
That trailer probably was even a lot more spoiler-y than the last one for Breath of the Wild was. There are still a variety of significant scenes in there that I have yet to see myself and I'm about to beat the game here after playing it for over 200 hours... It's ridiculous.
This moment felt a bit off for other reasons, though. I suppose I'm in a weird spot where I've freed some of the sages, but I haven't finished all the main storylines yet. How did they even know that I was going down there? I guess this will make a lot more sense once you're finished with all the temples, where there is also something that should bring you to Hyrule Castle again (which is also something that I know from the final trailer), but in this intermediate state it's quite weird.
But an explanation would be that they are all magically connected to their vows and came to your rescue the second this connection got severed. Only the sages will join you who you have freed, of course, so you won't get any support if you attempt on doing this right away in the early game.
And then you will have to fight all the temple bosses where you haven't freed the corresponding sage yet. This is the same mechanic as in Breath of the Wild, where you had to beat all of the undefeated Blights before Calamity Ganon.

In my case, I had to go up against "Colgera", where the other sages were of no help whatsoever, because this battle takes entirely place up in the air. I don't really know what Tulin's ability will be, other than it's something with wind, but it certainly not needed for this battle.
But come to think of it, you can probably defeat all of the bosses without the help of the sages. You can use Splash Fruits on the Mucktokok or Fire Seeds on the Queen Gibdo, but having the sage always made things more convenient and almost make it seem like you do actually need them. And I'm not sure about Gohma, since I've always used Yunobo for everything in that battle, because the marbled rocks seemed indestructible otherwise. But I will find out later. And the boss fights here might also have been simplified in certain ways.

For the last part Zelda appears, where for a moment I thought we might get a Puppet Zelda volley match here, but she turns right into Phantom Ganon. This confirms that there was an evil version of Zelda causing trouble after all, where this has been a little bit confusing. To my understanding, all the questionable sightings of Zelda around the stables simply turned out to be misunderstandings and not an evil version of Zelda doing bad things. But in other cases, like when she gave Yunobo that luchador mask, she was clearly up to no good.
Luckily, the Phantom Ganon fight only involves multiple copies of himself, but no Gloom Spawns. Those probably would have been the end of me in this open terrain...
The Demon King
Once you're done with the Phantom Ganons, the other temple bosses will get summoned as well, but the sages take over from this point. (The Seized Construct felt totally out of place here, but I suppose it's just there to give Mineru something to do during this sequence. It was such a gimmicky boss that it probably won't appear as part of the pre-final boss rush, where it shouldn't make much of a difference if you have Mineru already or not. Update: That's wrong. I was told that you will have to beat the Seized Construct as well if you haven't gotten Mineru's Vow yet.)

This gives you some alone time with Ganondorf, who finally decides to re-hydrate after just sitting down there for weeks. He suddenly looks as good as in the memories and I can't help but laugh. What stopped him from doing this any earlier? Why did he just sit down there? It's a common cliché for final bosses in a Zelda game, especially with Ganondorf, that they just sit somewhere idly and wait for you to come and beat them. This happened in Ocarina of Time, in The Wind Waker, in Twilight Princess, and now again in Tears of the Kingdom.
To be fair, in this case he did interact with the world via his phantoms, so he did something. And I still love the whole setting and atmosphere that they have created with this finale. So, this isn't a major complaint, but I would love to see a Zelda game in the future where the villain is much more active and a real threat in the game world.
The first thing I did was to throw a Giant Brightbloom Seed in the middle of the room and take out my camera to add Ganondorf to my Hyrule Compendium and to maybe make a statue out of him later. He did not react kindly to this... There is probably something to distract him again, like Hudson attached to a shield, but I didn't really experiment too much. Will do so once I go into this fight a second time with all sages and memories.
This is a good old-fashioned duel between Dorf and you, similar to the final fight in Twilight Princess. What sets this apart is that Ganondorf can do a couple of tricks normally only you can do in the game. He can switch between the different weapon types, which is very cool, and he can also perform perfect dodges, which slows down time for you as well. This makes things a bit easier, though, because it gives you an eternity to prepare to react for a perfect dodge of your own, but it's quite stylish nevertheless.

For the second phase he turns into his "Demon King" form with the horns. He buffs up so hard that his health bar will go all the way to the edge of the screen, which is just funny and has lots of meme potential. It's certainly memorable, but it breaks the fourth wall a bit and makes this moment appear less serious than it probably should...
The sages will join you again for this part of the fight, where now you're reliving the Imprisoning War. Their company won't last for long, however, which makes you wonder why they even bothered with integrating them here in the first place... It's a bit lame, because you already had your 1on1 and this really should have been the moment for the sages to shine, instead of being outmatched, like their ancestors were ages ago.
As in my recent Breath of the Wild playthrough, I could use the Master Sword during the entirety of the battle, which made things easy enough. I wonder whether it simply has so much durability in its awakened state or it's programmed to never run out of energy during the final boss fights. In its normal state the Master Sword always feels like a fancy tree branch, which caused a large contrast here.
But this was a very good fight overall, on par with the epic duels against Ganondorf in Twilight Princess and Demise in Skyward Sword, maybe even a bit better.
The Demon Dragon
"If all fails, just eat your Secret Stone." That's a lesson that Ganondorf has learned long ago and that now comes to fruition for his last act. This is the form of the final boss where I sadly had seen spoilers, because someone on Youtube thought it was a good idea to call a video about the music of this fight "Demon Dragon" and then put said Demon Dragon into the thumbnail, where this then made it right into my top suggestions (both the title and the thumbnail of the video got changed soon after several complaints).
If it had been any other form or any other boss for that matter, I probably wouldn't even been mad, but this took away a beautiful surprise that I didn't see coming, even though you most certainly could. It makes perfect sense that Ganondorf follows Zelda's example and turns into a gloom dragon, effectively. I've even been speculating about the existence of such a dragon back in February, before the game came out. And two dragons chasing each other's tails are right there in the game's logo...! It all adds up perfectly in this moment.

I also love how initially the Demon Dragon rises from Hyrule Castle, mimicking the aura of Calamity Ganon in Breath of the Wild and Age of Calamity. There is so much coming together here and they couldn't possibly have thought of a more epic final boss for this whole saga than this. It's Ganon, but as one of the dragons that always have been very magical in both Breath of the Wild and Tears of the Kingdom.

That being said, like with Dark Beast Ganon in Breath of the Wild, it's pretty much just a victory lap disguised by spectacle. In fact, you can just totally chill during this sequence. Zelda will catch you whenever you fall down below the Demon Dragon and the lift you back up. And you can just sit on her, without really being at any risk, where I took my sweet time with taking a shot for Hyrule Compendium.
It also took me a while to figure out what I even had to do here, where I just shot random parts with my bow, like you would do with any of the other dragons. And once I saw one of the pockets with weird eyes, I first tried shooting at it with my bow, but this only caused very little damage, even though I was using Bomb Arrows and other strong fusions. But this is where the Master Sword comes in, which destroys these pockets in a few hits. You can also safely land in them for some reason, unlike on the rest of the dragon.

If you haven't gotten the Master Sword before, which should be entirely possible, I suppose that this is where you will get it at the latest and Zelda will simply have it still on her head. In a way, the Master Sword then serves the same purpose as the Bow of Light during the Dark Beast Ganon battle, where it's your final weapon to take out the final boss. The difference is that you can get this weapon at any point in the game before this battle, given that you know where to look.
After your victory, the spirits of Sonia and Rauru will appear to restore both Zelda and your arm back to normal, so nothing will stand in the way of another potential sequel. As the last act in the game you will have to catch her as she falls, after you failed to do so in the beginning. Beautiful, simply beautiful! (Save for the little quick time event there, where I've messed up two times, because I couldn't read the "Hold" in the terrible red font color. Luckily, you can just keep trying.)

And then they both die after hitting a water surface at full speed, which crushes all their bones. The End.
Oh, wait... I forgot that this game is still silly about that and treats any body of water as a magical safety net. It's nice that you land exactly where you arrived in Hyrule after the tutorial, but I still can't get over the fact that this is physically possible. Okay, yes, it also was possible in past Zelda games, where for example Ocarina of Time let's you perform a variety of jumps from great heights into water, which was fun there, but Tears of the Kingdom really took this to the uncanny extreme.

The game then ends on some shirtless Link action. And they say they only make fan service for the boys... It was a nice moment, however, and I suspect that there will be a post-credit scene once you've collected all memories, like in Breath of the Wild. Can't wait to find out.
As usually, I did a lot of nitpicking, so let me finish things by saying that this is easily the best finale in a Zelda game yet. It's well staged, quite challenging, and a lot more satisfying than what they had done in Breath of the Wild. There is also no timer sequence, so that's another plus.
After Credits
Once you've beaten the game, it will activate the same post-game mode as in Breath of the Wild. Your save file will be marked with a star and you keep any pictures you took during the final battle, but everything else will reset to before the battle. It also now displays Zelda's Secret Stone on the loading screen, as if she were another sage rescued, which is a nice detail. But technically you already had her Secret Stone since the beginning, since this is the Recall ability.

The game also shows you your completion status on the Purah Pad and you can see my current progress below. The most interesting stat is probably the map completion, where I'm at 66% now, which is quite surprising to me. I actually thought that this would be a lot lower. In Breath of the Wild 72% were just the Korok Seeds and I don't have half of them yet, given that there are at least 900 again. But I suppose that with the Lightroots and the caves there is just a lot more stuff to check off on the map.
Needless to say that I will go for the 100%. It's Zelda and I love it. So, stay tuned, even though the credits rolled, this journey is far from over...
Progress:
- Sage's Vows: 4
- Sage's Wills: 13
- Main Quests: 16/23
- Side Adventures: 49/60
- Shrine Quests: 24/31
- Side Quests: 89/139
- Memories: 14/18
- Towers: 13/15
- Shrines: 124
- Lightroots: 105
- Caves: 104/147
- Korok Seeds: 369
- Schema Stones: 10
- Yiga Schematics: 21
- Old Maps: 15
- Map Completion: 66.09%

No comments:
Post a Comment