

This preview was originally published on ZeldaChronicles (formerly known as ZeldaEurope) and got translated for this blog in 2021 by the same author.
Yesterday I had the chance to playtest The Legend of Zelda: A Link Between Worlds for ZeldaEurope.de at a press event in Berlin, the "Nintendo House Party". I played it for about three and a half hours, enough to test the first three dungeons and pay attention to many details in the game. My full German preview can be found here.
My overall impression is very positive. The game is everything Aonuma promised it would be. It's very open, there's lots to explore, there's nearly no hand holding, there are puzzles that can you get stuck, etc. It's also very addicting and should offer good replay value. Can't wait to play it again!
Read the fully translated preview below:
Sword Walk
After warming up with the two levels of the demo known from E3 and gamescom (the Tower of Hera and an overworld segment), I got handed over the full version of the game. The beginning was already skipped on the save file, which is why I can't really say anything about the intro, but I was more interested in trying as many things out in the available time as possible than I was in the story, anyway.
But the game starts at your house from where you go to the smithy, which like in the original sits right next to Kakariko. The major difference is that there is now a direct pathway between these two places. The smithy is run by a three-person family, which we already know from the artworks, as well as a dwarf, who swings the hammer, just like in the Super Nintendo predecessor. Link is some sort of apprentice and you get the task to bring it to the captain of the castle guards.
Since I wanted to experiment, I ignored my first task right away and walked that sword (which you can't use yet) all over Hyrule. And if this were Twilight Princess, Spirit Tracks or Skyward Sword, I wouldn't have gotten far with such a crazy endeavor...
But this is A Link Between Worlds and this game let me visit a huge part of the overworld, completely unarmed. I could go all the way around Lake Hylia, up to the cave where you'd originally find the Ice Rod. And I've ran into some monsters in the Lost Woods, where I had to retreat. But the game let's you go there anyway. There is no fairy popping up, telling you to go the other way. There are no artificial obstacles blocking your path. A Link Between Worlds returns to the freedom of the Zelda classics and this feels really great.
And it looks equally great at that. Even with the 3D on it runs smoothly in 60 frames per second, where everything looks quite nice. It's the good, old Hyrule from A Link Between Worlds, brightly polished and with actual depth perception. It's a true eye-catcher. And even if you turn the 3D off, everything looks very three-dimensional, which should be great for people, who can't play with 3D on or only own a Nintendo 2DS.
The controls are precise and as smooth as the visuals. The touchscreen gets used sparingly, for example to study the map, but everything else runs on the press of a button. And the slide pad works really well. However, if you want to use the d-pad instead, you'll notice it's only there to shift the camera around. This is useful for looking around, but might be disappointing for those who like the simpler input.
Of Gravediggers, Merchants and Princesses
After exploring Hyrule for a bit, it was time to continue with the story. A guard at the castle gate points you towards the Sanctuary, where you meet Dampé, the gravedigger known from the Nintendo 64 Zelda games, but also the blue-haired maiden Seres, who gets trapped by the androgynous villain Yuga inside the Sanctuary. So, Boris tells you to make actual use of your sword and find the back entrance of the church at the graveyard.
Fans of A Link to the Past will probably remember that there was a second entrance to the tunnels, which connected Hyrule Castle with the Sanctuary, at the graveyard. And indeed you will find one under one of the tombstones, leading into the dark sewers full of rats and bats (Keese). This is where you find the lantern, which actually doesn't use up the new Energy Gauge. That bar isn't even there yet in the beginning of the game.
Well, the lantern brings light into the darkness and lets you light the torches all around, where the game's charming visuals create a nice atmosphere here. It's also where you get to fight enemies for the first time, which works as smoothly as everything else. Overall the tunnels are quite different from the Super Nintendo version, where you also can't go into Hyrule Castle from here any longer. But it's about as straight-forward and ends with the same classic puzzles, where you have to pull one of two levers.
Afterwards you'll meet Yuga at the Sanctuary, who abducts Seres by turning her into a painting. And as Link tries to fight Yuga, he literally runs his head against a wall...
You then wake up in Link's house, which is where you meet Ravio for the first time, the mysterious merchant in a bunny costume. This character seems quite funny and charming, but there is also something evil about him. It feels a little bit like the Happy Mask Salesman, where it was hard to figure him out. But this connection might also be raised from the fact that Majora's Mask is hanging on the walls of Link's house. You don't really know how it got there, but it's certainly an interesting detail.
Ravio suggests to report the incident to Princess Zelda, which brings you back to Hyrule Castle. Funnily, the outer castle walls got vandalised with graffiti of the evil soldiers that you know from A Link to the Past. The castle guards are trying to clean this up, but without success... This might already give you a bad feeling, but you can enter the castle safely for now.
On the outside this place is pretty much the same as in A Link Between Worlds, but the inside might remind you more of the castle in Spirit Tracks. There are training guards everywhere and the side entrances lead to their quarters.

After an argument with one of the guards, Impa grants you an audience with the princess. In the halls before the throne room you will find the five pictures, which already got released as artworks and tell the stories of how a past hero and the seven sages sealed the evil Ganon. While it's all very familiar, in detail it doesn't really fit after A Link the Past, nor after Ocarina of Time, because Ganon got sealed here (and not destroyed) and the Seven Sages don't include Zelda in this story... But before I really could come up with new timeline theories, Impa tells me that Zelda is waiting.
The princess is very charming and lovely, like in Skyward Sword. And the next destination gets set right away: Sahasrahla in Kakariko Village.
Shopping in Kakariko
Last weekend I've played through A Link to the Past
again to refresh my impressions about the game, so I can make
comparisons to its successor without being blinded by nostalgia. And one
of the best parts of A Link to the Past was leaving the
Sanctuary, where the world of Hyrule lies at your feet. You can go
almost everywhere and get many items, especially in Kakariko. This is
where the game really draws you in.
A Link Between Worlds is in no way inferior to this, where Kakariko is also a place with lots to discover and obtain. There is now a Milk Bar in the southeast of the village and the owner looks quite similar to Talon. The building is decorated with a cow and there are milk canisters everywhere. And if you get thirsty, you can already find a bottle, as well as the Bug-Catching Net. Like on the Super Nintendo, you can catch bees with it and put them into a bottle, where there is also a place to sell for them 50 Rupees. Easy money.
If you want to spend this money right away, then there will be a shop waiting for you in the northwest of the village. It offers a shield, as well two fruits, which are new to the series. The "Foul Fruit" stuns enemies around you (but I haven't really tried this) and the "Scoot Fruit" lets you teleport out of a dungeon, basically as a replacement for the Magic Mirror. Thanks to my bee selling business I could already afford all of these items and fill my inventory quite a bit.
Another item was waiting at the Fortune Teller north of Kakariko. This is where you get the Hint Glasses, which lets you see Hint Ghosts. With these glasses on the environment gets darkened and the music damped, which might remind you of the wolf sense from Twilight Princess, especially since it lets you see ghosts as well. These ghosts wear glasses themselves, read books and share their wisdom for cash – not Rupees, however, but the Nintendo 3DS Play Coins.
I've only tried this feature once, right at the large rock behind the Fortune Teller's tent. The ghost told me which item is required here, which I won't spoil, but A Link to the Past veterans can already imagine.
Eastern Palace
Sahasrahla tells you the game's backstory about Ganon and the Seven Sages again, where he's afraid that Yuga might be after their descendants. He sends you to the Eastern Palace to look for one of these descendants, before it's too late. You won't be getting far there, however, because a gate secured by a classic crystal switch is blocking the way, where you can't reach the switch with your current items. But the pillars with a bow symbol on top of them will give you a clear hint of what you need here...
And this is where Ravio comes in, who wants to open shop in Link's house – an item rental shop. The bow will be a free sample and you also get Ravio's Bracelet as a gift, which adds the Energy Gauge to your screen. All of Ravio's items use this, where now one shot with the bow won't cost you any arrows, but a part of the gauge, which then refills automatically after a short cooldown.
On the compound of the Eastern Palace the usual enemies will be waiting for you. Fast Octoroks, which will fire in different directions. Armos statues, which will become alive, once you get near them. And also Tektites, where their high jumps look especially impressive with the 3D on. Compared to A Link to the Past the enemies feel a lot smoother and you also don't have the problem that the enemies might just run into you for some frustrating hits. It's more pleasant to fight foes, but this might also make the game a little easier.
At the entrance you'll meet the descendant of the Sages, who also seems to be one of Ravio's customers. He has the item looking like a fancy shovel – the Sand Rod. You probably won't be getting this item until later in the game, because the Sand Rod gets put together with the guy into a painting by Yuga and abducted.

And
this is where you get into the first dungeon, the Eastern Palace
itself. The Tower of Hera dungeon from the demo was very linear, so I
was afraid that the other dungeons might be similar. In the past ten
years Nintendo developed a preference for linear dungeon design, which I
personally find to be quite boring. A good dungeon feels more like a
maze and has optional parts to explore.
The Eastern Palace took some of my worries, however. There were usually multiple paths to take and when I arrived the end of the dungeon, there were still three bigger rooms unexplored and a couple of treasure chests left on the map. This is quite the unusual picture for a total Zelda nerd like myself, but a picture to my liking. It seems like Nintendo wasn't just oriented towards the classic overworld, but also the classic dungeons.
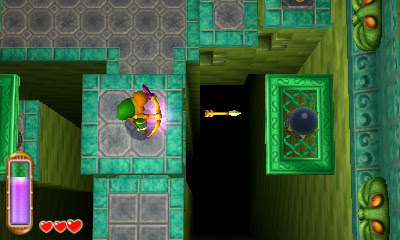
One of the main aspects of the dungeon were platforms that can be altered in height, which makes good use of the 3D effect. But of course there also had to be the huge iron balls, which you need to dodge and which look even more dangerous in 3D. And the classic music of the Hyrule dungeons from A Link to the Past sounds better than ever during all of this.
The first boss wasn't the set of the giant Armos Knights, however, but your first battle with Yuga, who uses his ability to turn into a mural quite well to avoid Link's attacks. He also creates paintings on the wall, which will cause bursts of lightning and fire. Good use of the bow and sword are needed to finish this battle quickly and without harm.
And here it's time to nitpick somewhat, because the aiming with the bow wasn't to my liking. In Phantom Hourglass and Spirit Tracks you could perfectly aim in all directions and you would assume that they would offer something similar with the slide pad of the Nintendo 3DS. Instead Link moves around while aiming in the same direction, where you also only can fire in eight directions.
One Bracelet to rule them all
When things are looking bad for Yuga, he turns Link himself into a mural and disappears... But what he didn't anticipate is the power of Ravio's Braclet: it turns you back to normal and even gives you the ability to turn into a mural at any time (whenever there's a smooth wall).
Through a rift on the wall of the boss chamber you'll be able to get outside, where you'll learn this new ability in an impressive way on the outer walls of the Eastern Palace. There are also some purple jars, which will refill your Energy Gauge instantly. It seems like this is the part, where you can get to all those treasure chests and rooms that I've missed earlier, but I decided to proceed in the adventure instead.

Yuga's next target is Princess Zelda and Hyrule Castle gets shrouded in a dark barrier, where the demonic soldiers now come out of the walls and occupy Hyrule. And while the enemies so far seemed somewhat easier when compared to their Super Nintendo counterparts, the soldiers are more dangerous than ever. Especially those that are using a lance are hard to fight with a sword, where you can't be shy with using your bow. You also have to actively shield with the R button, which makes fights a little bit more interesting.
The fights are also somewhat more realistic, where the soldiers are actually able to hurt each other, for example with their arrows. And it's fun to experiment here and try to lure one enemy into the line of fire of the other, where the combat is more engaging than it used to be in A Link to the Past.
Like in A Link to the Past, you'll get the Pendant of Courage at this point in the game and you're tasked by Sahasrahla to find the other two. One is located in Hera's Tower again, but the other is at an entirely new dungeon. You'll need new items for both of these, where it was time to pay Ravio another visit.

At the time I could only rent his items, where the prices vary between 20 and 100 Rupees. The ones for 100 Rupees are the Fire and Ice Rods. Boomerang cost 50 Rupees, the Hammer only 20 (this was a discount). Since I had more than 700 Rupees in my wallet, I decided to simply rent ALL of the items. And yes, this is possible with one exception: the Sand Rod went away with the person you met earlier and therefore is not available right now.
But my item menu got expanded by seven additions at once go: Bombs, Boomerang, Hammer, Hookshot, as well as the Tornado, Fire and Ice Rods. I've only really needed the Hammer and the Tornado Rod for the next dungeons, but you have to take what you can get. And this is how I already got to enjoy almost all the items right from the start, which is a lot of fun.
The rented items have purple bunny ears attached to them and this is also where the role of Ravio's little bird-like companion gets explained: if you die, then it will collect all the items. I never experienced this myself, but there were some close calls, where the first half of the game is quite similar to that from A Link to the Past. And this gives you hope that the game will get a lot tougher later on.
Realm of Possibilities
While the game was already quite open up until this point, now it shifts up a gear. Not only are there two dungeons waiting for you, the many items in your inventory let you discover something new in every corner.
The Bombs for example let you open up caves in many places, including the one for Mother Maiamai. 100 of her little fellows are hidden in the world from now on and you can conveniently check on your map how many Maiamais are left for every area. And they can hide everywhere. Behind houses, in jars, in trees, under water...
Usually you just hear their squeaky noises around, but it's hard to tell where it's exactly coming from. It's like a mix of the Secret Seashells from Link's Awakening and the Gold Skulltulas from Ocarina of Time, two of my favorite collectible quests.
And it's certainly worth it to collect the little animals. Mother Maiamai will upgrade one of your items for every ten Maiamais. But only if they aren't rented. While I already was able to collect ten of them, I wasn't able to purchase items from Ravio yet... And I couldn't find out when Ravio let's you purchase the items for real. Maybe you have to die once, maybe this happens after a certain point, I don't know.
While searching for the Maiamais you'll start to take a closer look around all over Hyrule. And this is where Link's new mural ability starts to shine, because the shifted perspective offers a variety of new discoveries. For example there are paintings of Rupees and Hearts at the backside of houses, which you can now collect. And there are some funny details, like Majora's Mask hanging on the wall in Link's house. If you merge right there, it looks like Link is wearing the mask...
The GameBoy Advance version of A Link to the Past also wasn't forgotten by Nintendo, where the sparkling Rupee Rocks re-appear in this game. Those will scatter Rupees all around them, if you hit them repeatedly with the sword.
Since Rupees are very important in this game, you will be able to find them pretty much everywhere. There are even new mini dungeons in the Eastern Palace area and next to the graveyard, where you can score bigger amounts of Rupees. And you often find treasure chests in the environment, which will take good use of all your abilities. But sometimes they only contain 20 Rupees or even less, which seems somewhat unbalanced, considering how quickly you can make many from selling bees. It doesn't seem worth the effort.
Even More Items
With all these new toys and discoveries it's easy to forget that there are two red markers on your map, urging you to explore them. Ravio's arsenal of items isn't enough to get to these dungeons, however, where you'll also need the Power Glove and the Zora's Flippers respectively. The latter aren't as easy to get, because you have to find a stolen gem, which prevents the Zora queen from getting fatter and fatter. But this also shows that there are some items that you will still obtain traditionally.
On your adventures you'll also run into the flying witch, Irene. There was a similar character in Oracle of Ages & Seasons with Maple, where you'd literally run into her, but Irene in this case is a little friendlier and acts as this game's teleport service. She gives you the Bell, which can be rung from the bottom left corner of the touchscreen to call her. This flying broom taxi then takes you to one of the weather vanes all over Hyrule, which works very similar to the Wind Crests in The Minish Cap.
The weather vanes have to be activated first and they also are the only way to save the game, similar to the Bird Statues in Skyward Sword. And that's a shame, because with a handheld game you'd want the ability to save at any time.

I was also able to find a second bottle, which had a message inside, reminiscent of Ocarina of Time. With that I already had 15 of the 20 item slots in my inventory filled. Assuming that there will be two more bottles to find, as well as the already sighted Sand Rod, this means that there are only two unknown items at this point. So, it feels very weird to have such a wide arsenal so early in the game. But weird doesn't necessarily mean bad, where this is also quite exciting. It's fun to try all the items and see what you can do with them.
It's not like you need all these items already, however. Hookshot, Boomerang, Ice Rod and Fire Rod aren't really required for anything at this point and are only there to play around with. They probably will be more relevant later in the game, though.
House of Gales
Since I had already played the Tower of Hero in the demo, I decided to head for the completely new dungeon – the House of Gales. It's some kind of windmill house at Lake Hylia, which Nintendo also showed in one of the trailers. If you're wondering why the journey didn't go to the Desert Palace: the desert is entirely sealed off this time with no way in. My best guess is that the desert works the other way around to A Link to the Past and you'll only get there via a portal in the Dark World / Lorule. We'll see!
But what's more interesting than the mystery of the desert is the new dungeon. You'll need the Tornado Rod to get in, where the item creates a gale, which blows you up and stuns enemies around you. You can also put out fire with it. The Tornado Rod essentially acts as a key for the dungeon, so you can't even enter the place without it.
And on the inside the item will be used in a variety of ways, where it's easy to forget that there's also the new wall merge ability. Eiji Aonuma wasn't exaggerating when he said that you might get stuck in the game because of it, which happened to me twice in this dungeon. You have to think outside the box and this creates some fresh puzzles for Zelda, which were much needed for the series.

The boss of the dungeon was quite impressive as well. It was some kind of moving pillar with an eye on its top, which tries to push you into the abyss. The battle is a lot of fun and looks incredible in 3D, where this was a creative and perfect finish for the dungeon.
Summiteer
My left thumb hurts, my stomach is growling. There is a buffet on the Nintendo House Party waiting, as well as nice people having fun with titles like Wii Party U or Super Mario 3D World. But I couldn't just put down A Link Between Worlds yet and throw myself into the fray. The game was just too much fun and there was still a lot to explore, where I've decided to climb Death Mountain as well.
And for the first time since A Link to the Past this area lives up to its name. Spectacle Rock is now an active volcano shooting lava rocks down at you, while rolling rocks reign over caves. The latter can be destroyed with the Hammer or dodged by turning into a mural. But some of the rocks also have Rupees on them, which get dropped when you destroy them.
The "Deadrocks" also return, which are these fast enemies, which turn into solid stone when you attack them. Overall Death Mountain is an area full of dangers and Link's new mural form gets used cleverly to walk along the cliffs.

After all these obstacles you will eventually reach the west peak of Death Mountain. And I've decided to look around a little bit more, before going into the Tower of Hera, where I noticed that I can use the Hookshot to reach the east peak as well...
And this is where a long forgotten concept of the Zelda series awaited me: enemies as obstacles! Lynels, the centaur-like creatures, which do a lot of fire damage, greet you there, posing a huge threat at this point in the game. While they force me to retreat, it's an exciting encounter, because it's been a while that a Zelda game dared to do this. The newer games usually played it safe.
If A Link Between Worlds were anything like that, you wouldn't even be able to get the Hookshot, before you are strong enough to face the corresponding enemies. But A Link Between Worlds lets you test your own limits and offers a bit of that RPG aspect that the Zelda classics had. It's refreshing and also interesting for experienced players seeking a challenge. And this is much more memorable way for the game to tell you to turn around than some abyss that you can't cross just yet.
The Tower of Hera seemed to be identical to the demo level. Since I had already played this just earlier, I tested that new Scoop Fruit to exit the dungeon part-way. When jumping back to the entrance the screen then gets pixelated, similar to using the Magic Mirror in A Link to the Past, which is a nice detail.
But overall I found it more interesting to explore Hyrule a little bit more, collect some Maiamais and enter caves. I would have loved to take the game right home with me to continue all this, but I had to say goodbye to it and with it to my save file. Once I get the game myself, I will have to play it all over again from the beginning...
And if this was Spirit Tracks, Twilight Princess or Skyward Sword with their slow and tutorial-heavy starts, I would have dreaded the thought of repeating the first three hours. But not so in this case. The beginning is so well made and offers so much freedom that I'm looking forward to playing it all again. A Link Between Worlds could become one of those Zelda games that has the right amount of replay value, inviting you to play it again from the beginning. And we didn't have such a Zelda for a while.
One thing was clear: once you have the game, you won't be putting away that Nintendo 3DS anytime soon. Thanks to Nintendo and Popular PR for the invite! It was a lot fun and I'm really looking forward to the game.
3 comments:
I really want to play this game. Now! >_<
I can't wait! Also what is Tornado Rod? I haven't seen photo from it or anything :o
There has been two artworks of the Tornado Rod... it's the propeller like thing. Nintendo even showed it in their trailer from August.
Post a Comment